How to Make a Concrete or Cement Countertop Yourself: A Step-by-Step Guide
Concrete countertop
A concrete countertop in the kitchen is practical, stylish, and cost-effective. It holds up well under pressure, can be made in any shape, and even customized with color or texture. But many people wonder: Is it really possible to make a countertop like this on your own, without professional equipment? The answer is yes. The main thing is to follow a proven process and take your time.
Where should you start if you want to build a cement countertop yourself?
First, determine the size, shape, and placement. Prepare a drawing and decide whether the countertop will be a single piece or made of several sections. Next, build the form. This is the mold where you’ll pour the concrete. It’s usually made of laminated plywood. Don’t forget the side panels and sealing with form release — this is the foundation for poured concrete countertops.
What’s the difference between working with cement and concrete? Which one should you choose?
Many people considering how to build concrete countertops don’t fully understand the difference between cement and concrete. Here’s the simple answer: cement is the base, one of the components, and concrete is the ready mix — stronger and more reliable. Concrete is the better choice for building a durable kitchen countertop, especially if you add reinforcement mesh or fiberglass.
How do you properly pour concrete into the mold?
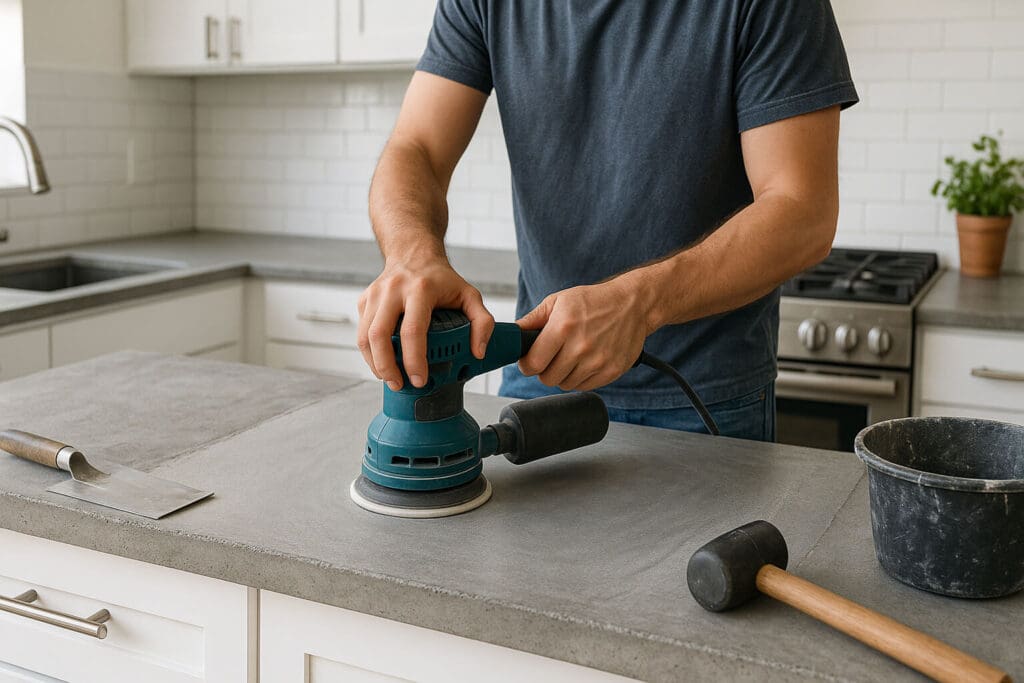
Once the mold is ready, lightly spray it with water and coat the interior walls with a form release agent (for example, Akona Concrete Form Release). This will help you easily remove the form once the concrete has cured. Then pour the concrete in small batches, spreading it evenly with a trowel or float. To remove air bubbles, gently tap the edges of the mold with a rubber mallet or use a standard orbital sander by pressing it to the side of the form — the vibration will pass through the plywood and release trapped air. This step is especially important if you're learning how to make cement kitchen countertops, as it directly affects the smoothness and durability of the final surface.
When should you begin sanding?
You can start sanding about 12–16 hours after pouring, when the concrete has hardened enough to safely remove the form. This step turns the raw slab into polished concrete countertops with a clean, smooth surface. Begin with coarse sandpaper or a grinder (80–100 grit), then move to finer grits — up to 400 and beyond if you want a satin finish. After sanding, thoroughly wipe the surface with a damp cloth to remove dust before applying the sealer.
How do you protect the concrete countertop from stains and moisture?
The final step is sealing. To keep the concrete from absorbing moisture and grease, apply 2–3 coats of penetrating sealer with drying time in between. One of the most popular and reliable options is Tuff Duck Concrete Countertop Sealer. It forms a strong, matte protective layer and maintains the natural look of the concrete. After sealing, your cement kitchen countertops are easy to clean, water-resistant, and add character to your kitchen.
Conclusion
Now you know how to build a cement countertop and go through all the steps — from building the form to sealing. Poured concrete countertops are a great way to create a custom design without overspending. And if everything is done carefully, you’ll have a true polished concrete countertop that will last for years.
This is our price research for Carrara Moro and Calacatta Idillio countertops in Daly City, CA. Find out which companies took on our project and how much they paid for it.
Dave Milligan
294
The Stone MagazineTechnology and MaterialsStone Countertop Prices and Installation Costs in the U.S.
This is our pricing research on Carrara Moro and Calacatta Idillio countertops. Find out which companies took on our project and how much they quoted for it.