How to Make a DIY Epoxy Resin Countertop: Best Resins, Step-by-Step Guide, and Design Ideas
Introduction
Making an epoxy resin countertop yourself may sound like a project meant only for advanced DIYers. And honestly, the material can feel intimidating at first — how do you use it? What does it smell like? Is it strong enough? Safe for kitchens? For your health? I remember that feeling too — being excited to try, but afraid to mess it all up.
But once you understand how epoxy works, everything starts to make sense.
In this article, I’ll walk you through how to choose a reliable epoxy resin for countertops, how to start the project, what tools you’ll need, and how to avoid the most common mistakes. You’ll learn how to properly pour on epoxy for countertops, what design styles are trending, and how to create a “wow” effect even on an old base. We’ll cover technique, where to find inspiration, and — most importantly — give you plenty of practical guidance.
If you’re not just looking to save money but to create a beautiful, functional result that you can proudly show off — you’re in the right place. All you need is a bit of patience, a clear plan, and the willingness to try. Let’s break down how to build a countertop that makes you smile every day.
What You Should Know If This Is Your First Time Working with Epoxy
When people talk about epoxy resin countertops, they often mean different formats and production methods. This can create confusion, especially during the planning stage.
An epoxy resin countertop is a seamless surface created by pouring resin over a prepared base or into a mold. Once cured, the resin forms a moisture-resistant, visually continuous layer.
A poured countertop is a variation where epoxy resin becomes the main working surface. This format is used both to refresh existing countertops and to create new pieces from scratch.
What Are Epoxy Countertops and Why Are They So Popular?
If you’ve ever seen a glossy kitchen surface that looks like marble or has that dreamy, see-through depth — like a swirling ocean or even a galaxy trapped in glass — chances are, it was an epoxy resin countertop. And yes, it was probably handmade.
Epoxy countertops are more than just a pretty finish. They’re strong, water-resistant, and completely seamless surfaces that can either be poured from scratch or applied over an existing base — like laminate, wood, or concrete. If you’re casting the epoxy into a mold and letting it cure into a standalone slab, that’s what’s called a poured countertop.
What makes epoxy such an appealing choice?
First off — design freedom. You can mimic marble, add metallic accents, create glass-like layers, or go bold with rich, deep color blends. Second — affordability and accessibility. Epoxy is one of the few materials that allows you to truly refresh a kitchen without a full remodel, and yes — it’s absolutely doable as a DIY project.
The surface doesn’t absorb moisture, is easy to clean, and with the right care, it can last for years. Of course, it has its own features that you should know about in advance. But if you're looking for a way to update your space in a way that’s cost-effective, visually stunning, and totally doable with your own hands — epoxy deserves your attention.
Epoxy Countertops vs. the Rest: Is It Worth the Effort?
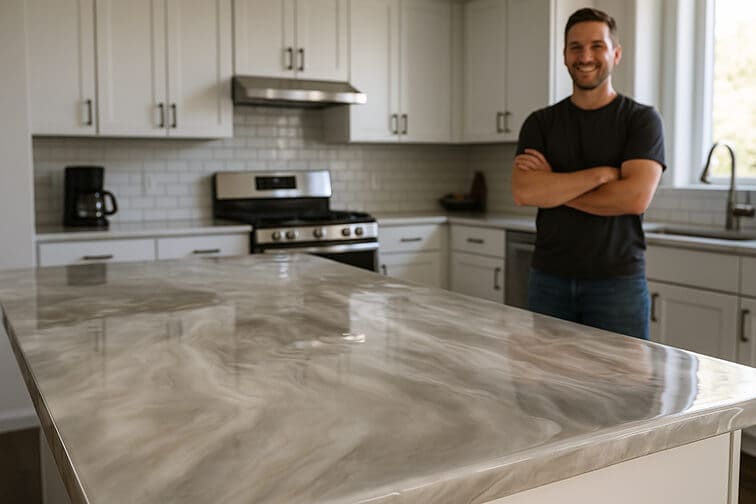
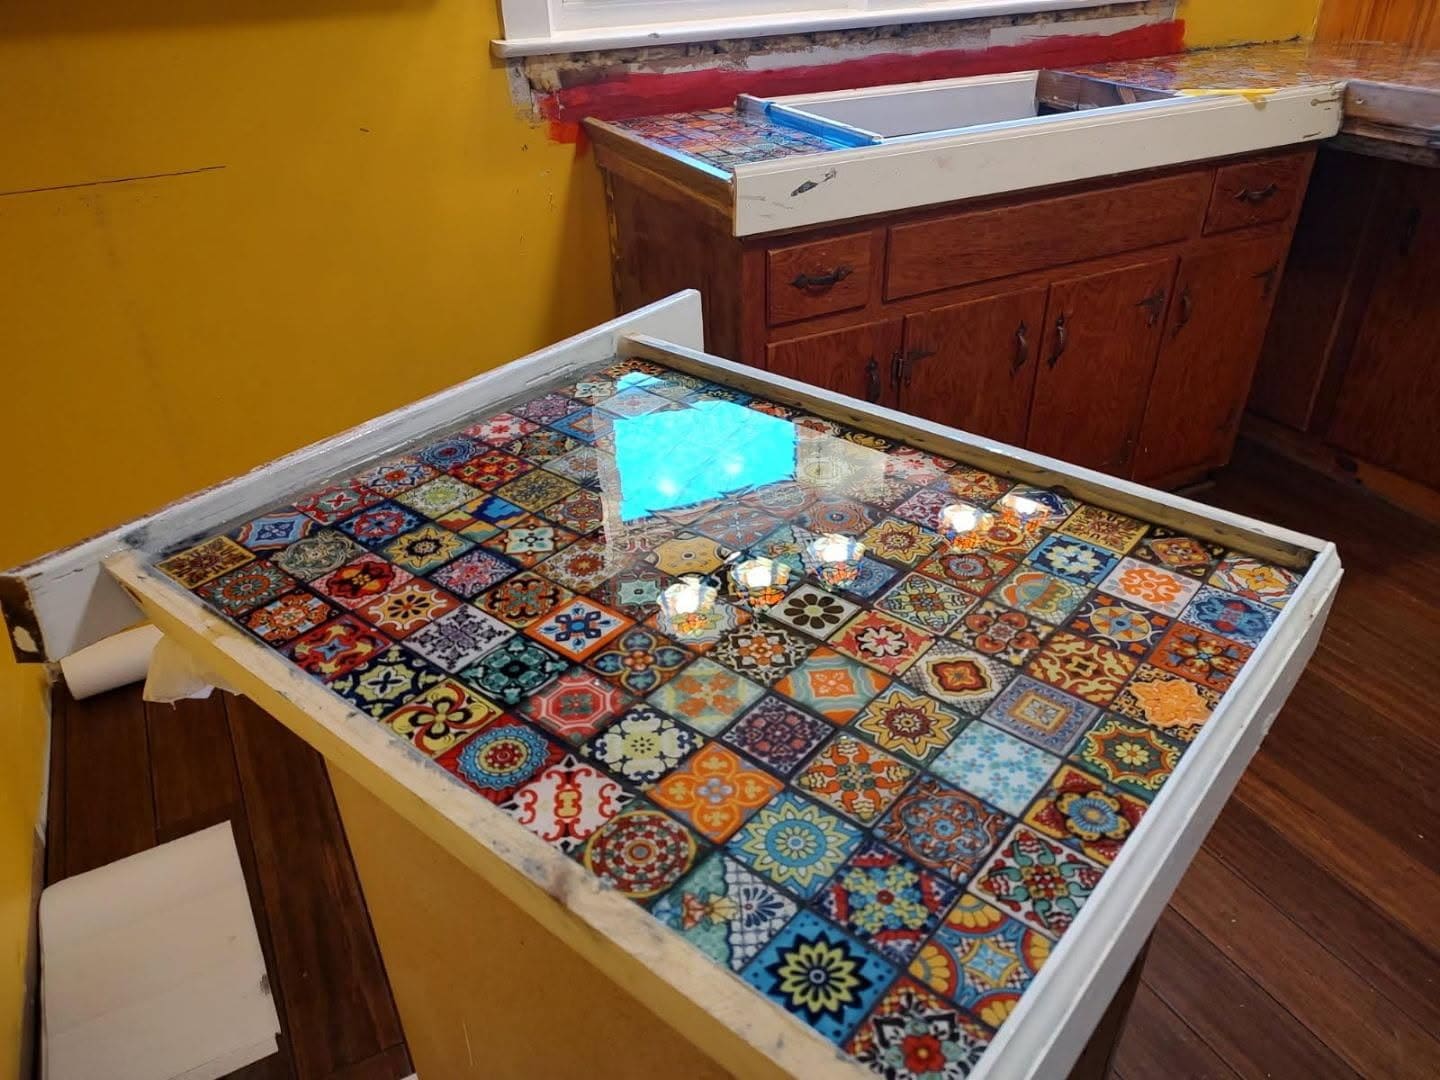
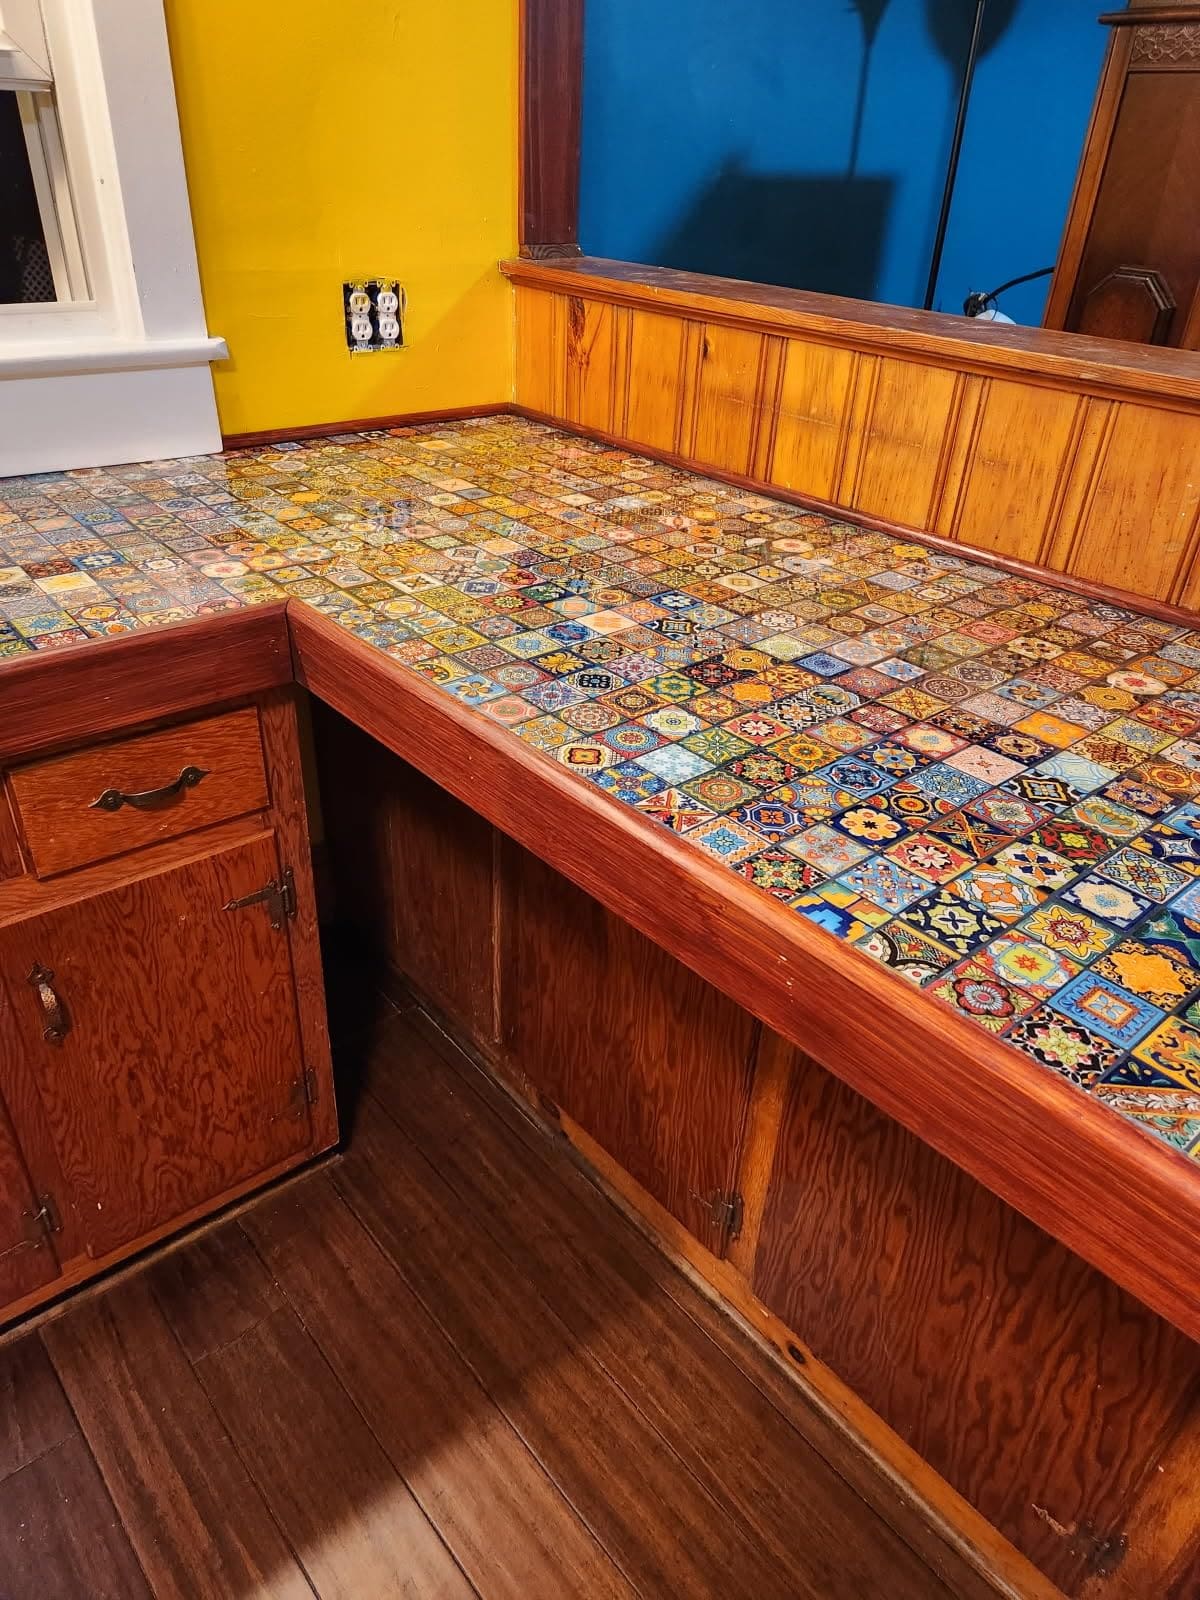
Prefabricated epoxy resin countertop based on an old countertop.
Source: amazon.com
In the previous section, we already mentioned that epoxy resin countertops can be poured over an existing surface — like laminate or concrete. It’s a great way to refresh your kitchen without tearing anything out.
But a reasonable question comes up: what if I already have a stone or quartz countertop?
Can I pour resin directly on top of it?
And more broadly — how do epoxy resin countertops compare to other popular materials? Let’s break it down.
Here’s how they stack up in key categories: appearance, durability, maintenance, cost, and the ability to do it yourself.
Material
Appearance
Durability and Lifespan
Maintenance and Care
Price* ($/sq. ft.)
Can You DIY It?
Epoxy resin countertops
Glossy, rich colors, marble or 3D effects
Medium (depends on maintenance)
Easy to clean, non-porous
$50–$150
Excellent for DIY
Quartz
Uniform, modern, premium
Very high
Minimal upkeep
$50–$200
Contractor required
Granite
Natural veining, unique patterns
Very high
Requires sealing
$40–$150
Pro recommended
Marble
Luxurious, dramatic veining
High, but delicate
Needs careful maintenance
$40–$150
Only with installer
Concrete
Modern, industrial aesthetic
High if poured properly
Requires sealing
$50–$150
Possible, but tricky
Laminate
Simple, stone-look available
Low
Susceptible to moisture and scratches
$20–$80
Great for budget DIY
Approximate: for a 30–40 sq. ft. kitchen, installing an epoxy resin countertop may cost between $1,500–$3,000*. For comparison, the same area in marble can cost $3,000–$5,000*, not including installation.
Can you apply epoxy resin over stone or quartz?
Short answer — yes, you can. But only with proper surface preparation. Natural stone and quartz countertops have a smooth, dense surface, and to ensure good adhesion, you need to prepare the surface properly.
When does this solution make sense?
The stone countertop has become dull, scratched, or visually outdated.
You want to change your kitchen style without removing or replacing the whole slab.
You need a temporary but striking update before a renovation or home sale.
How to Choose Epoxy Resin for a Countertop: Safety, Convenience, Results
When it comes to creating a countertop yourself, the first (and most important) choice is the resin. It’s what determines whether your surface will be glossy and durable — or sticky, dull, and full of bubbles. Today, there are dozens of epoxy products on the market, and not all of them are suitable for kitchens and bathrooms.
Let’s break down what to look for so you don’t make mistakes from the very beginning.
What to Look For When Choosing
Here are the key characteristics to consider when choosing resin for a countertop:
Transparency and finish — a good resin stays fully clear after curing (or evenly tinted, if you added pigment), doesn’t get cloudy, and doesn’t develop a dull or hazy look over time.
Heat resistance — a countertop might heat up (for example, from a coffee mug or nearby appliance), so the minimum resistance should be around 120–150 °F. That’s enough for typical household use.
Food safety (food-safe) — always check that the resin is certified as safe for surfaces used to prepare and serve food. This is stated on the label.
Curing time — the slower a resin cures, the fewer bubbles and defects it will have. Ideal specs: working time of 20–40 minutes, full curing in 24–72 hours.
Pour depth — for countertops, it’s best to use what’s called deep pour or countertop epoxy, which is designed for thick layers and won’t overheat during application.
Suitable Resins for Home Projects
Here are a few options that are often recommended as reliable and proven (and easy to find on Amazon or in specialty stores):
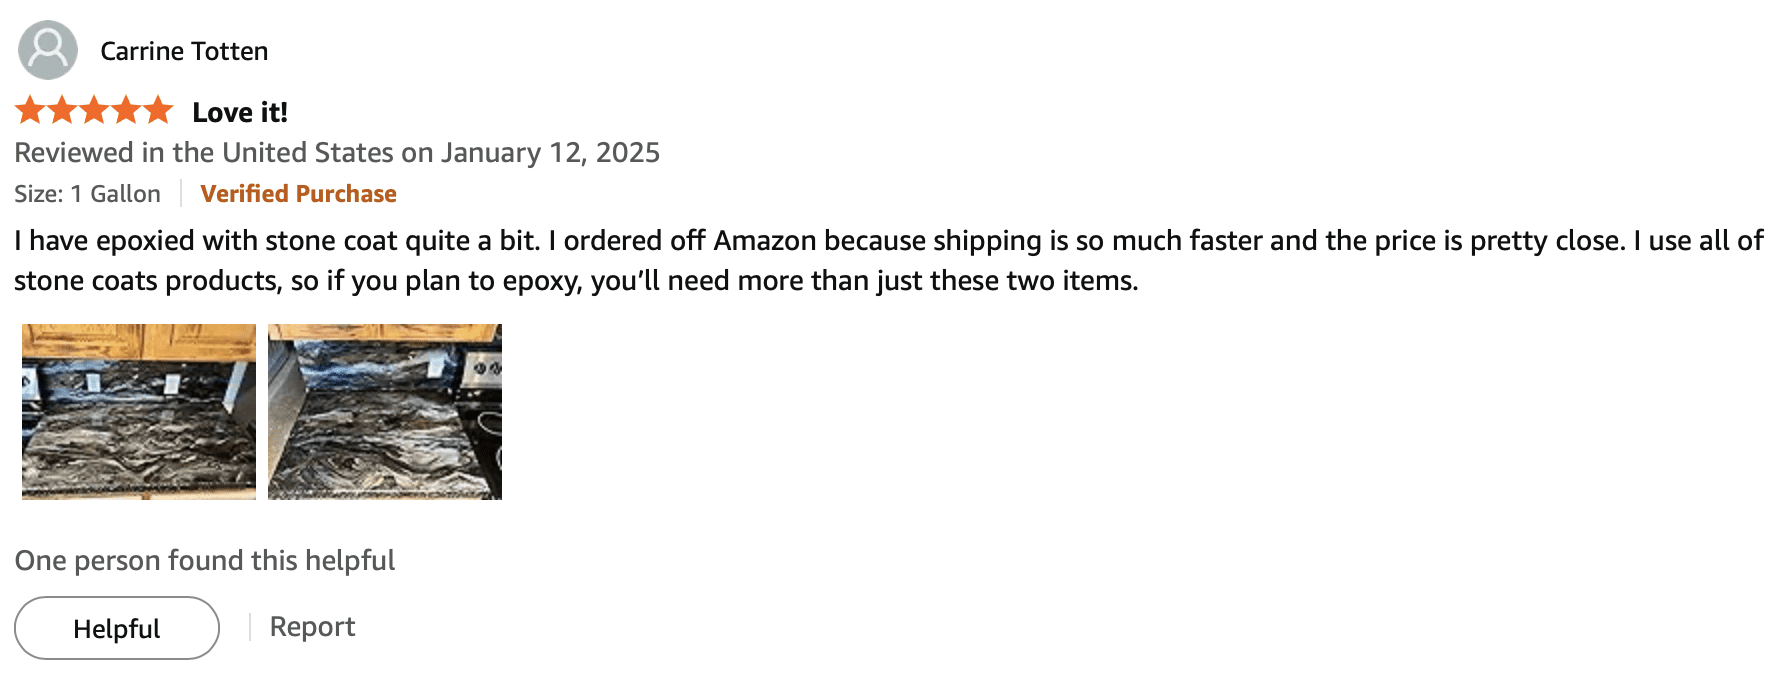
Stone Coat Countertops Clear Epoxy Resin Kit — a popular choice among DIY enthusiasts. It delivers a beautiful glossy finish, works well with pigments, and is resistant to scratches and heat. It’s suitable for kitchens, bathrooms, and even dining tables.
Source: amazon.com
Pro Marine Supplies Crystal Clear Epoxy — it’s a versatile resin with UV resistance and high clarity, which makes it a great option for countertops near windows or in bright spaces.
Source: amazon.com
What Definitely Won’t Work?
Artistic resins (resin art) unless the manufacturer specifies they’re food-safe — these may contain dyes or toxic components.
Construction or industrial resins — they’re usually designed for floor sealing and won’t give you the finish you want for a countertop.
If you’re choosing a resin for your kitchen, don’t rush. Read the label, compare specs, and check real customer photos in reviews. A good resin is half the success of the project. And the other half? That’s exactly what we’re here to help you with — from prep and pouring to care and design.
What Do You Need to Make an Epoxy Resin Countertop Yourself?
When you first start thinking about this kind of project, it might seem like you’ll need a full-on home workshop. But in reality, it’s much simpler: you can make an epoxy resin countertop even in the kitchen of a regular apartment — the key is to be properly prepared.
What You’ll Definitely Need
You’ll need a basic set of tools and materials that are easy to find on Amazon or at a hardware store:
Epoxy resin — clear, UV-resistant, suitable for countertops and decorative surfaces.
Pigments and colorants — used to create marble-like veining, color swirls, depth, and glow effects.
Mica Powder
Price: $12.99*
Source: amazon.com
Silicone cups and mixing sticks — reusable and convenient to work with, especially if you’re doing multiple layers.
Spatulas, spreaders, notched trowels — help distribute the resin evenly and shape the edges.
Respirator or mask (for example, 3M Half Facepiece 6200) — essential when working indoors, especially during the first hours after mixing the components.
Painter’s tape — useful for protecting walls, cabinets, and floors from drips and overflows.
Heat gun or hot air gun (for example, Wagner Spraytech HT1000) — helps remove air bubbles from the resin surface and shape the pattern.
The Base: What Can You Pour Resin On?
The good news is that you can create an epoxy resin countertop on either a new or existing base. The key is that the base must be solid, stable, and free of significant warping or cracks.
Suitable bases include:
an old laminate or MDF countertop;
18–20 mm thick plywood (often used as a base for designer countertops);
a concrete slab or cement base;
a custom-built mold with edges (if you want to make a poured countertop from scratch).
Important: the base must be completely dry and free of grease and dust. If you’re pouring onto a porous surface (like plywood), it’s best to first prime it with a thin base layer of resin.
“From personal experience, I highly recommend not skimping on prepping your workspace. Cover the floors and nearby surfaces with plastic sheeting, and use painter’s tape to protect the edges. It’ll save you a ton of time and frustration when it comes time to clean up afterward.”
In the next section, we’ll go through the actual pouring process in detail — step by step, with examples and tips. If you prepare everything in advance, the process itself turns out to be surprisingly fun and totally doable — even for a beginner.
How to Make an Epoxy Resin Countertop Yourself: Step-by-Step Instructions
Once everything is ready, it’s time to move on to the most exciting part — the pour. Don’t worry if it seems complicated: in reality, it all comes down to care, attention, and timing. Below, I’ll describe a basic process that I’ve personally tested and that has been used many times by other DIYers. This method works for both full casting from scratch and resurfacing an old countertop.
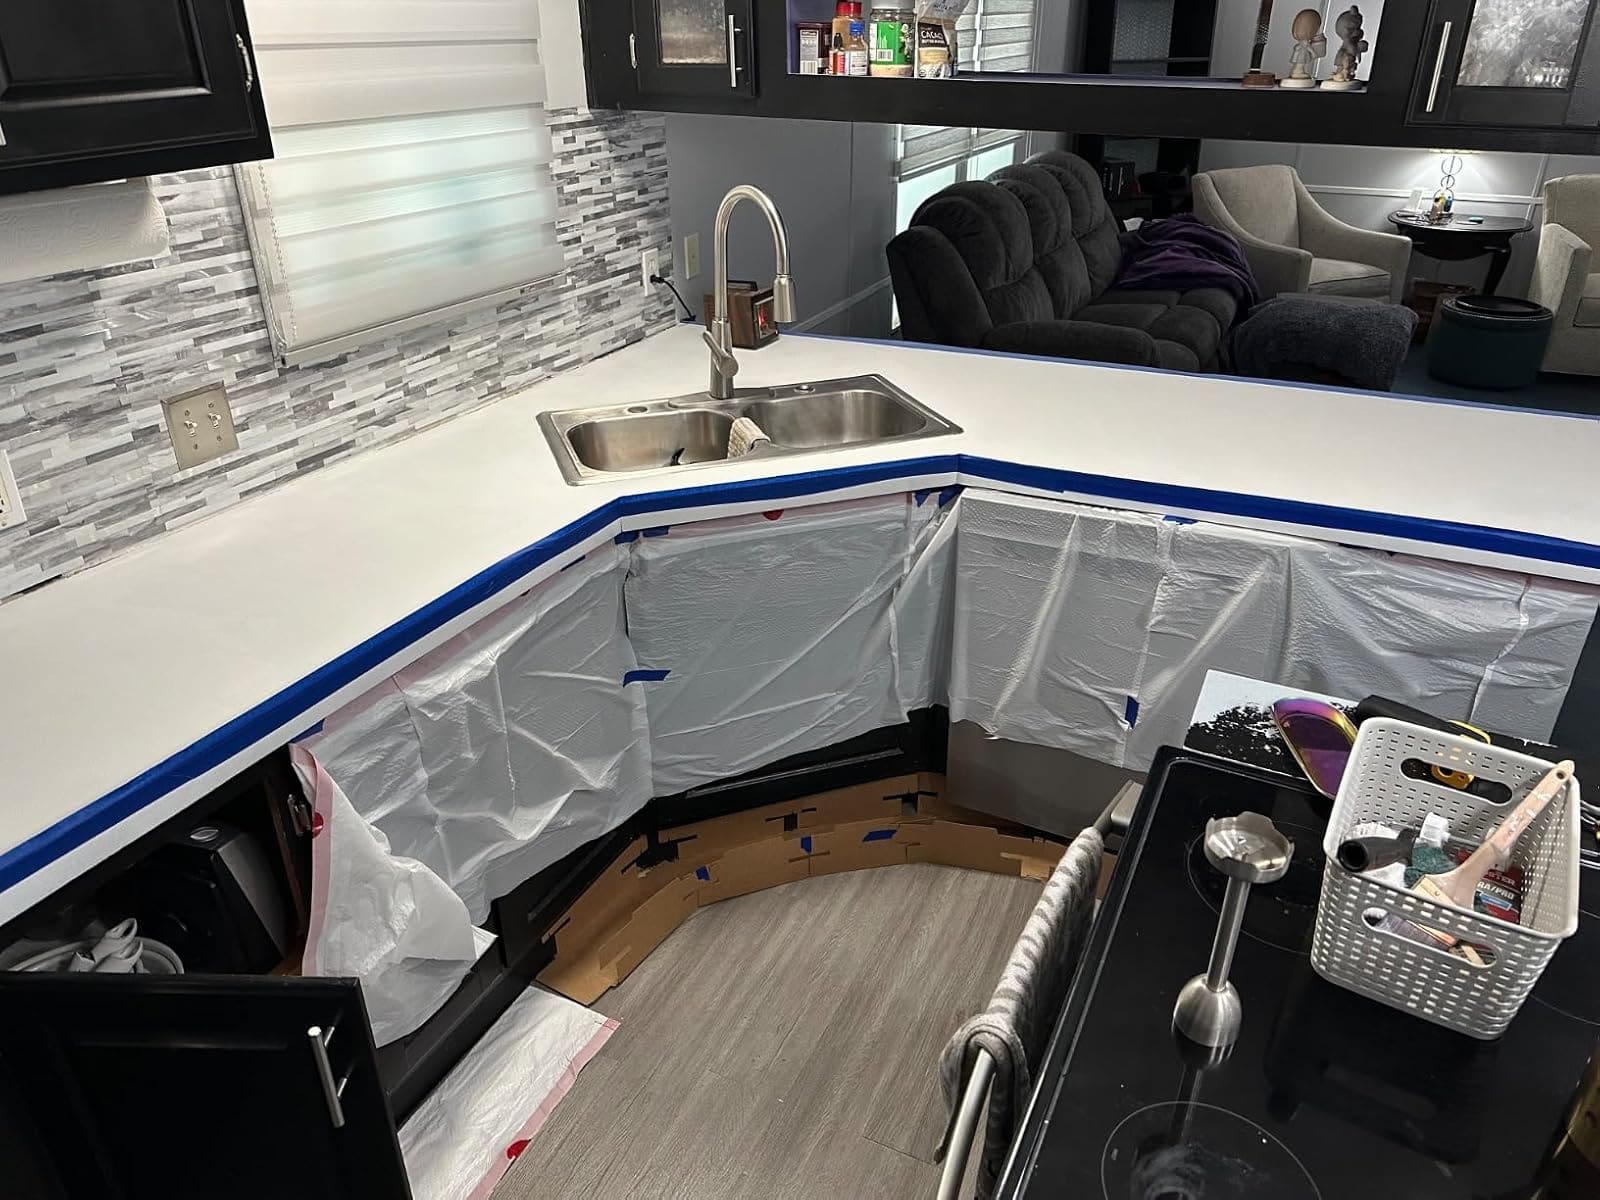
Step 1. Preparing the Base
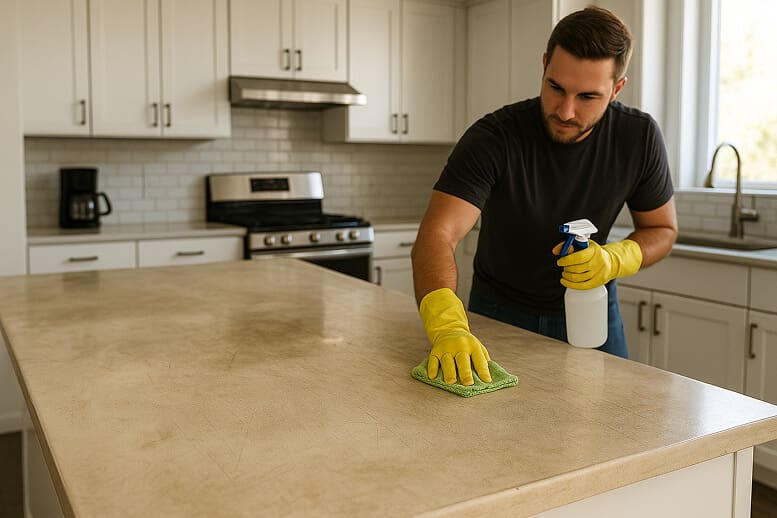
Remove old grime, grease, and buildup. The base should be completely clean and dry. If necessary — sand the surface, especially if you’re working with glossy laminate, concrete, or stone. Degrease with alcohol or acetone.
Important: build edge barriers from plywood or silicone so the resin doesn’t run off.
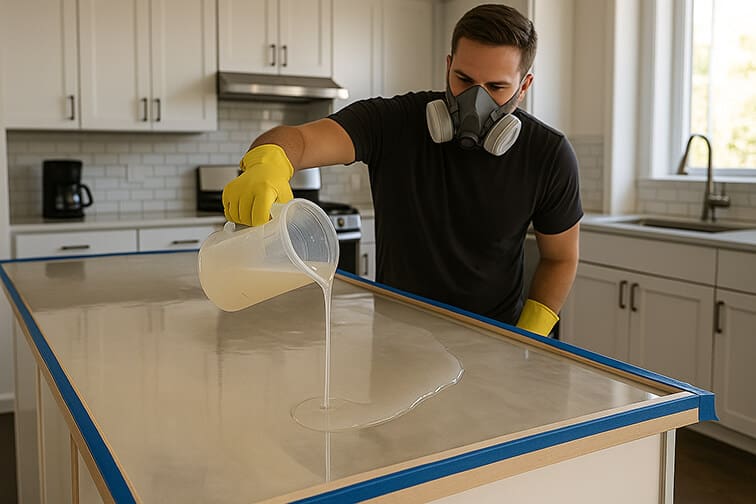
Step 2. Primer Layer
Before the main pour, apply a thin base layer of resin. This improves adhesion and prevents air bubbles. At this stage, you can tint the resin with a base color (for example, white for marble or black for “depth”).
Step 3. Main Pour
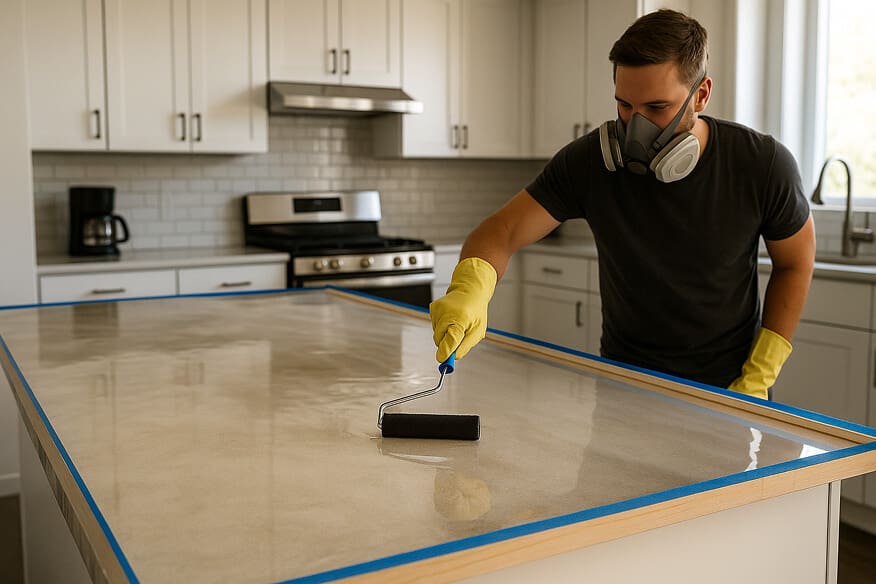
It’s time to pour the epoxy resin for the countertop (pour on epoxy for countertops). Mix the components exactly as instructed — usually 1:1 by volume. Stir slowly for at least 3–5 minutes, trying not to introduce extra air.
Pour in small portions, spreading the resin evenly across the surface using a trowel or spreader. Don’t rush — you’ll have about 20–30 minutes of working time before the resin starts to set.
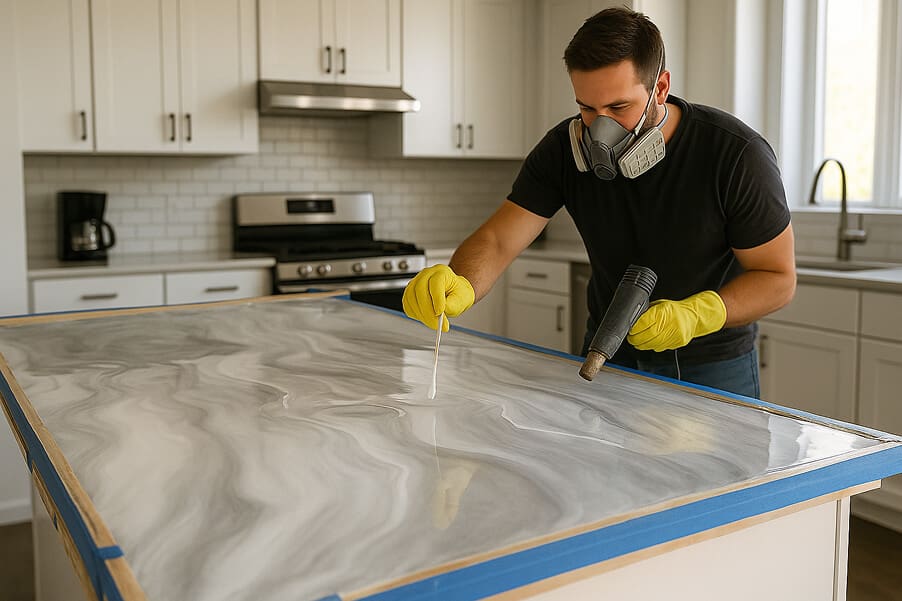
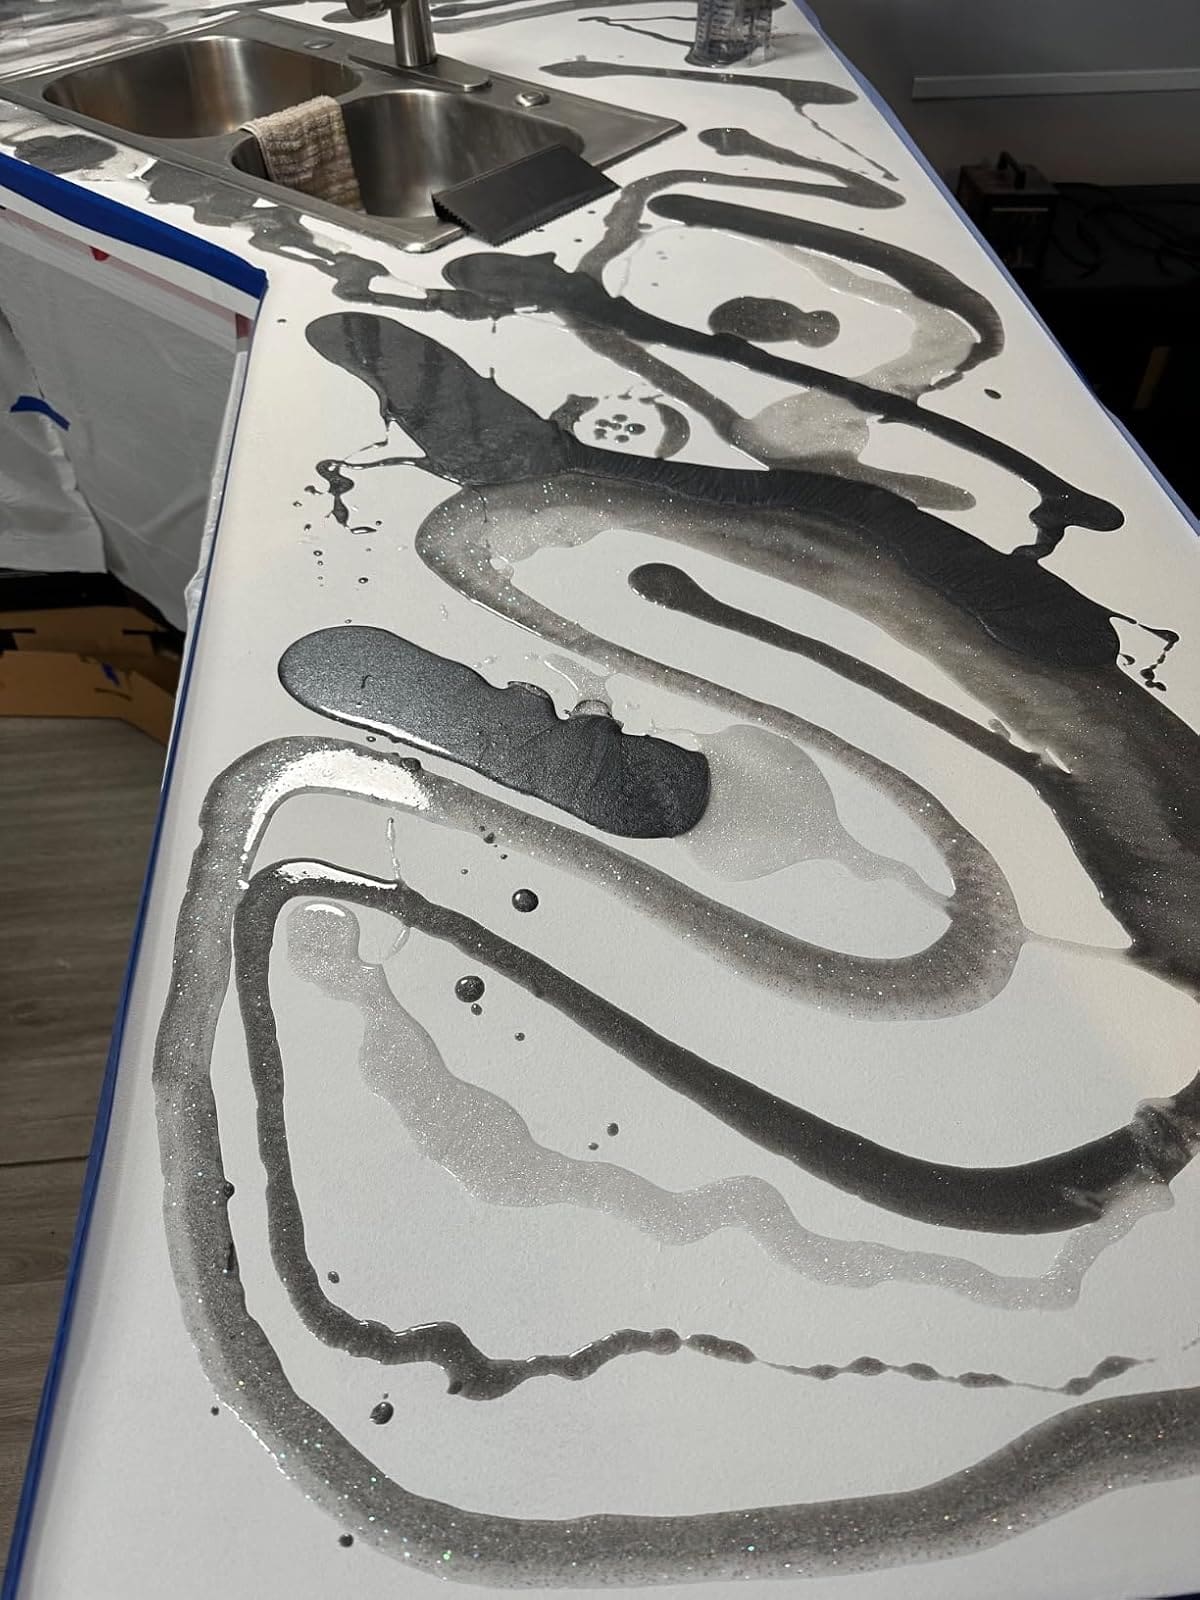
Step 4. Creating the Design
Now it’s time to add decorative elements. You can use pigments, alcohol inks, metallic pastes, or premade color blends. For a marble effect, draw veins with a thin stick and gently blend them using a heat gun or brush. For rich 3D effects, pour in stages — typically 2–3 layers.
“I experimented with blue and gold streaks - it looked surprisingly professional. The key is not to go overboard and give yourself time to think before pouring on the next color.” – @janefurseJ (Reddit)
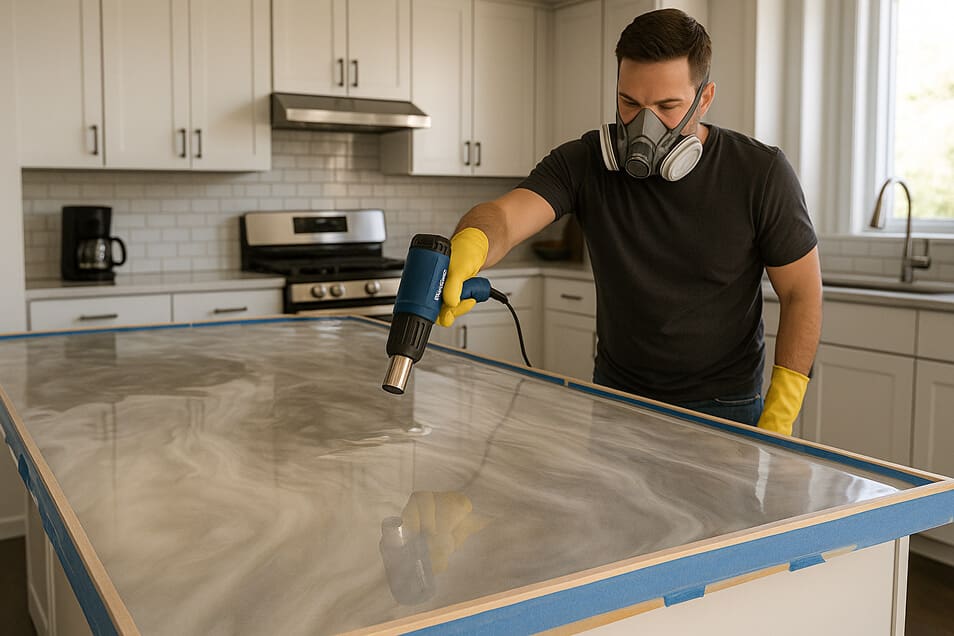
Step 5. Removing Bubbles
Immediately after pouring, go over the surface with a heat gun or hot air gun on medium temperature. This helps remove air bubbles and softens the color.
Tip: don’t direct hot air at one spot for more than 2–3 seconds so you don’t “cook” the design.
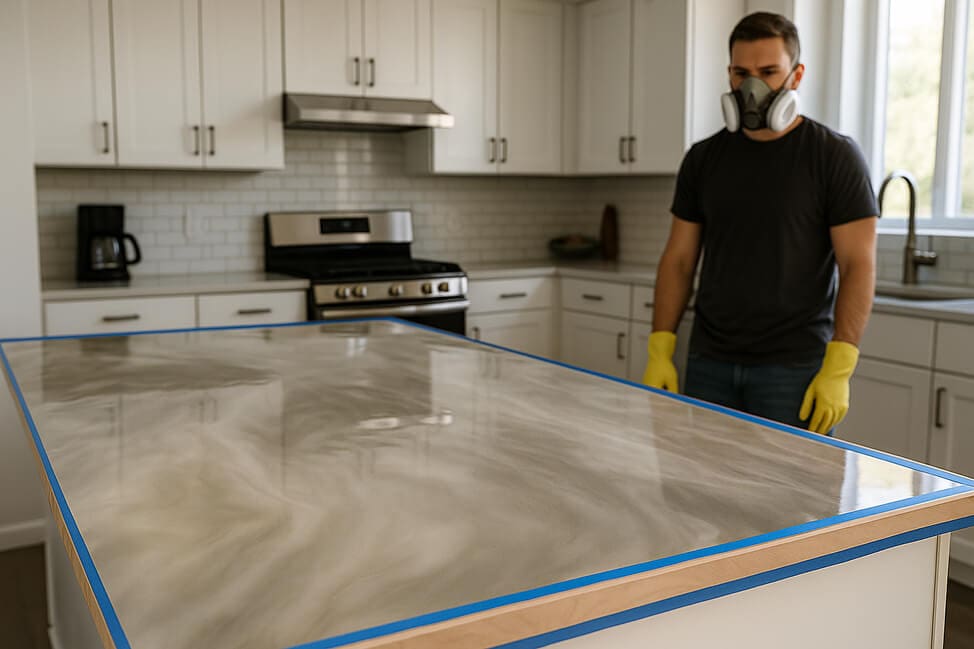
Step 6. Final Coat and Curing
Once the decorative layer is complete, if needed, apply another clear finish coat. Leave the countertop in a dust-free room for 24–72 hours, depending on the product. Don’t touch or cover the surface — this is a critical curing period.
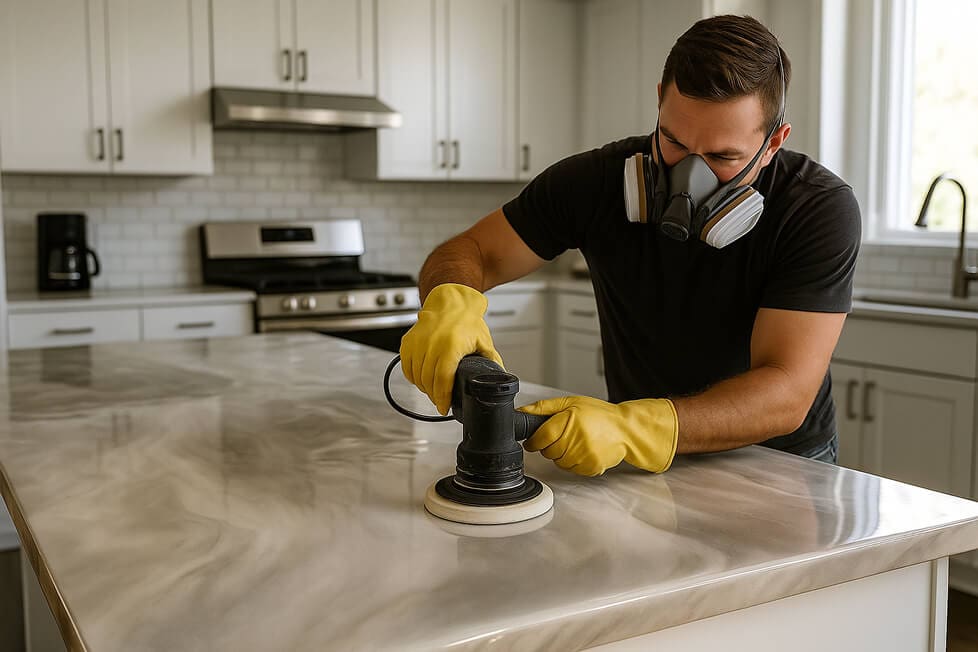
Step 7. Sanding and Polishing (Optional)
If you want a perfect gloss, you can go over the surface with fine-grit sandpaper (1000+) and then a polishing compound. This step is optional, but it adds depth and gives your countertop an almost “factory-made” finish.
That’s it! You’ve just made your first DIY epoxy countertop. As you can see, it’s completely doable if you take it step by step, follow the instructions, and don’t rush. In the next section, we’ll look at the most common mistakes beginners make — and how to avoid them. That’ll save you not just materials, but nerves too.
Mistakes When Working with Epoxy Resin: How Not to Ruin the Result
If you’re making a countertop yourself for the first time, mistakes are almost inevitable — but most of them can be avoided simply by knowing where others typically trip up. Below are the most common situations beginners run into when working with epoxy resin. Let’s break down how to avoid them — without stress or unnecessary costs.
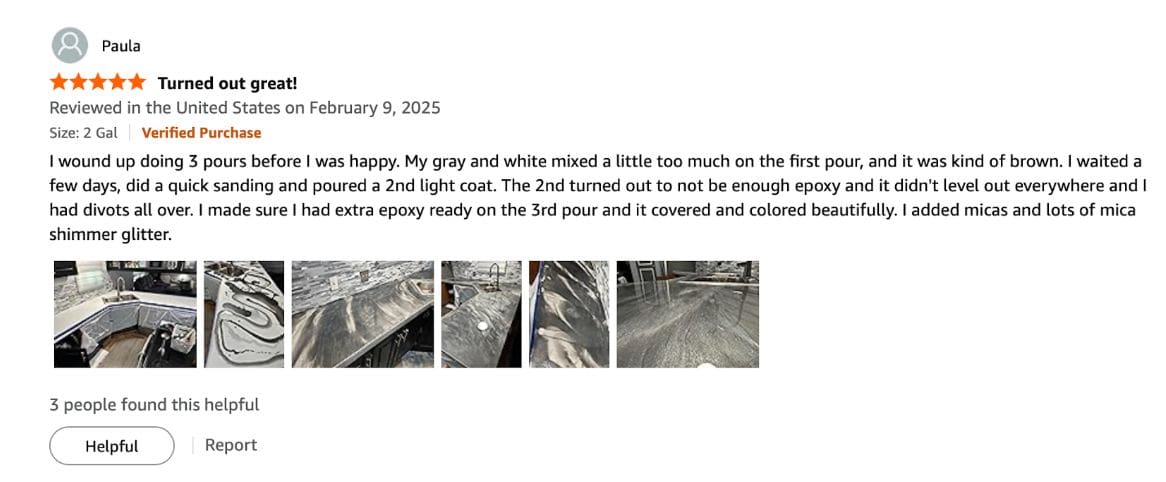
Mistake 1. Incorrect Mixing Ratios
A small imbalance — and everything can go wrong. If you add a bit too much hardener or not enough resin, the surface might stay sticky, turn cloudy, or fail to cure properly.
What to do: Always use measuring containers and follow the instructions on the packaging. Most of the time, it’s a 1:1 ratio by volume. Mix for at least 3–5 minutes — slowly and steadily, without rushing.
Mistake 2. Pouring Too Thick a Layer
It might seem like a thicker layer will create a more dramatic effect. But in reality, this can cause overheating, bubbles, and cracks. That’s because resin generates heat as it cures.
What to do: Pour in 1/8-inch layers. It’s better to do two thin pours with a pause in between than one thick one that ruins the whole project.
Mistake 3. Working in the Wrong Conditions
Temperature and humidity in the room directly affect the result. If it’s too cold, the resin won’t flow properly. If it’s too hot, you’ll end up with twice as many bubbles.
“I did the pour in the garage where it was cool and damp. The countertop ended up dull and I had to sand the whole thing again.” – @TerryWilssa (Reddit)
What to do: the ideal temperature is between 70 and 75°F. Ventilate the space, but avoid drafts. If humidity is high — use a dehumidifier.
Mistake 4. Poor Surface Preparation
If you pour resin directly onto wood, tile, or laminate without sanding and degreasing, the resin can blister, form bubbles, or start to peel away.
What to do: Always sand the surface thoroughly, degrease with alcohol or acetone, and apply a thin base coat to improve adhesion. This is especially important when working on a porous substrate.
Mistake 5. Trying to Fix the Resin Before It Cures
A common mistake: you pour the resin, spot a crumb or speck — and reach in to remove it. The result? Dents, fingerprints, or a design that’s been shifted or ruined.
What to do: After pouring, step back and don’t touch the surface for at least 24 hours. If something doesn’t look right, make a note of it, review what happened, and aim to improve next time. That’s a normal part of the learning process.
The most important thing is not to rush or panic. Even if something doesn’t go perfectly, most issues can be fixed with the next layer or some sanding. And if you stay calm and focused, the result might really surprise you — in a good way — especially for a first project.
In the next section, we’ll dive into the most creative part. We’ll cover which designs truly work, how to achieve that “wow” effect, and where to find inspiration so you can create not just a countertop, but a statement piece you’ll be proud of.
Design Ideas: How to Make Your Countertop Truly Unique
One of the main reasons more and more people are choosing epoxy resin is because it offers complete design freedom. There are no limits on pattern, color, or texture. You can create a calm, classic white marble-style countertop — or turn the surface into a true work of art. The key is figuring out what speaks to you.
Here are a few styles that have stood the test of time and look stunning in real-life interiors.
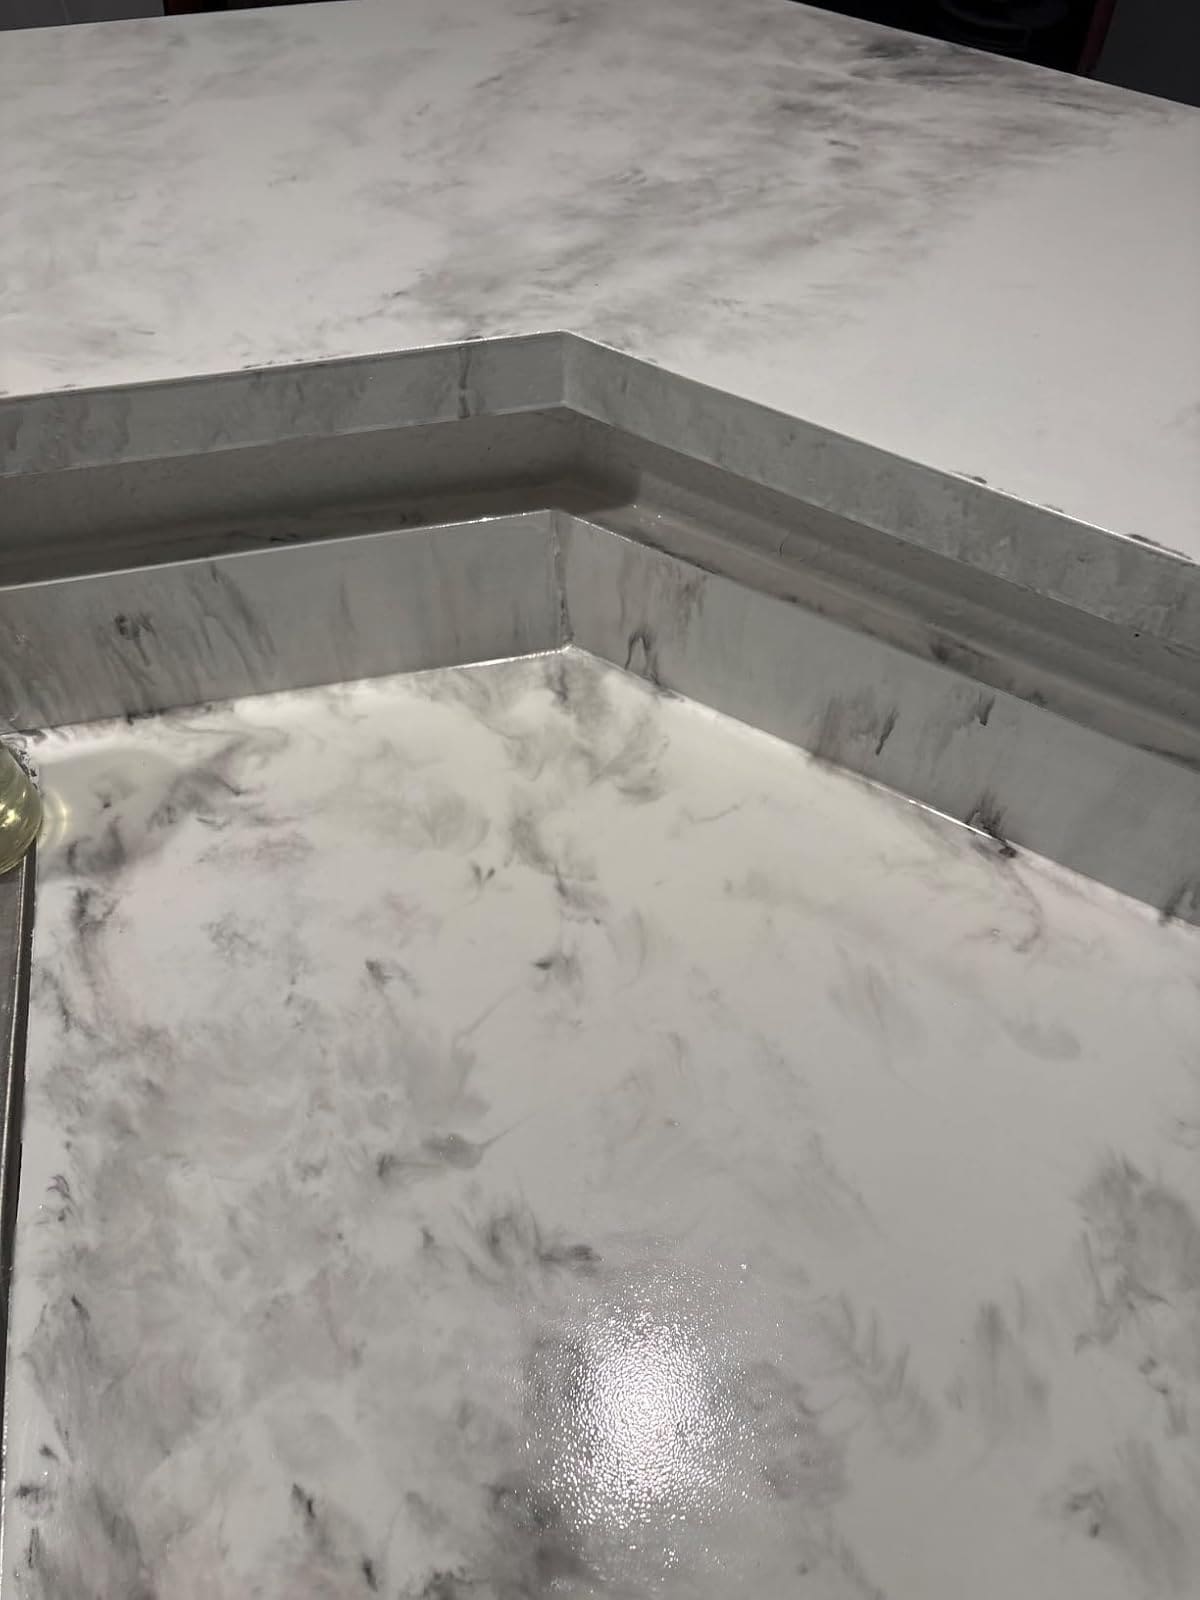
Marble Veins
A classic that never goes out of style. A white base with thin gray or golden veins fits beautifully into a bright kitchen or bathroom. This kind of design can be created using pigments, alcohol inks, and careful blending with a heat gun or brush.
Source: amazon.com
Source: amazon.com
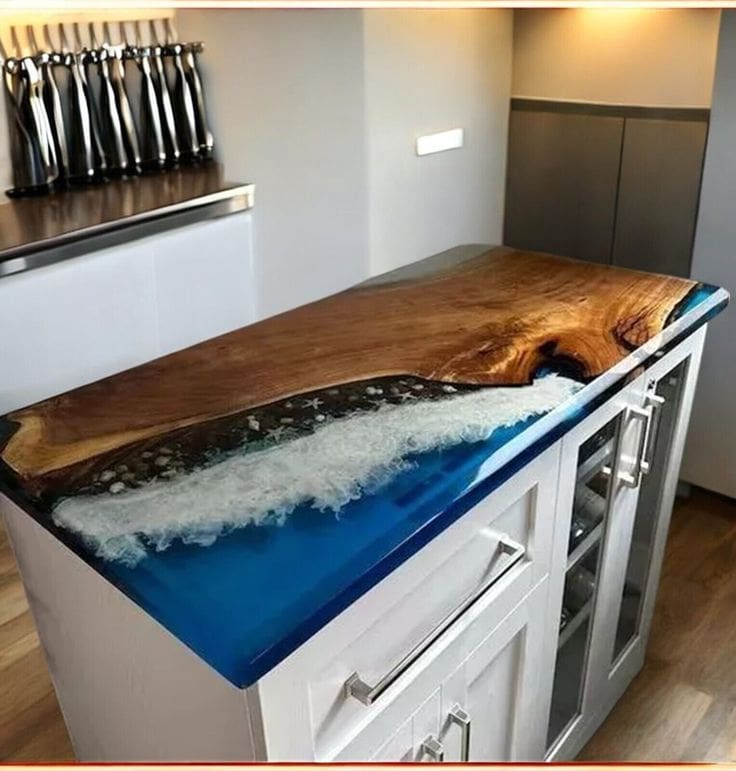
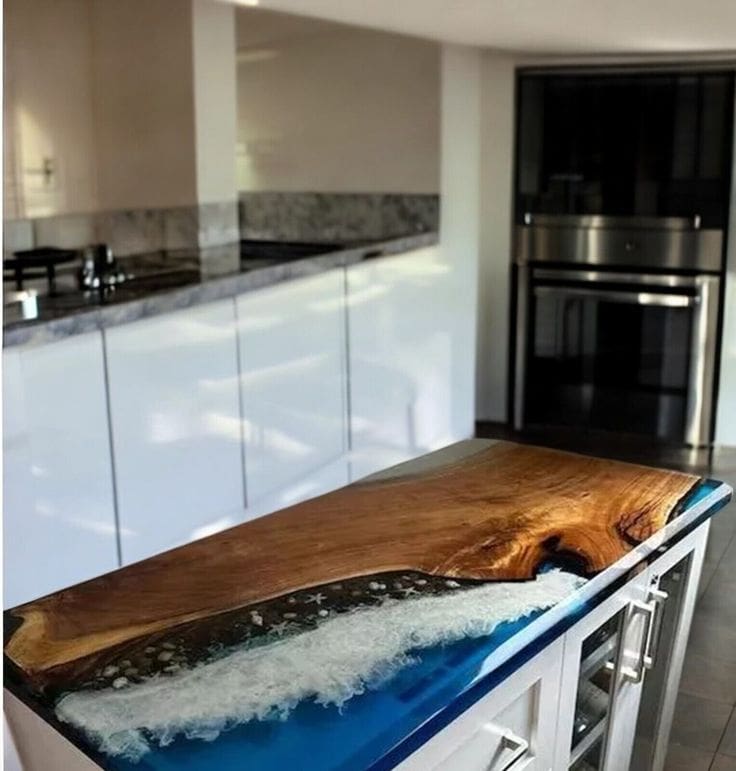
3D Depth Effect
Source: @jukeboxwendy (Pinterest)
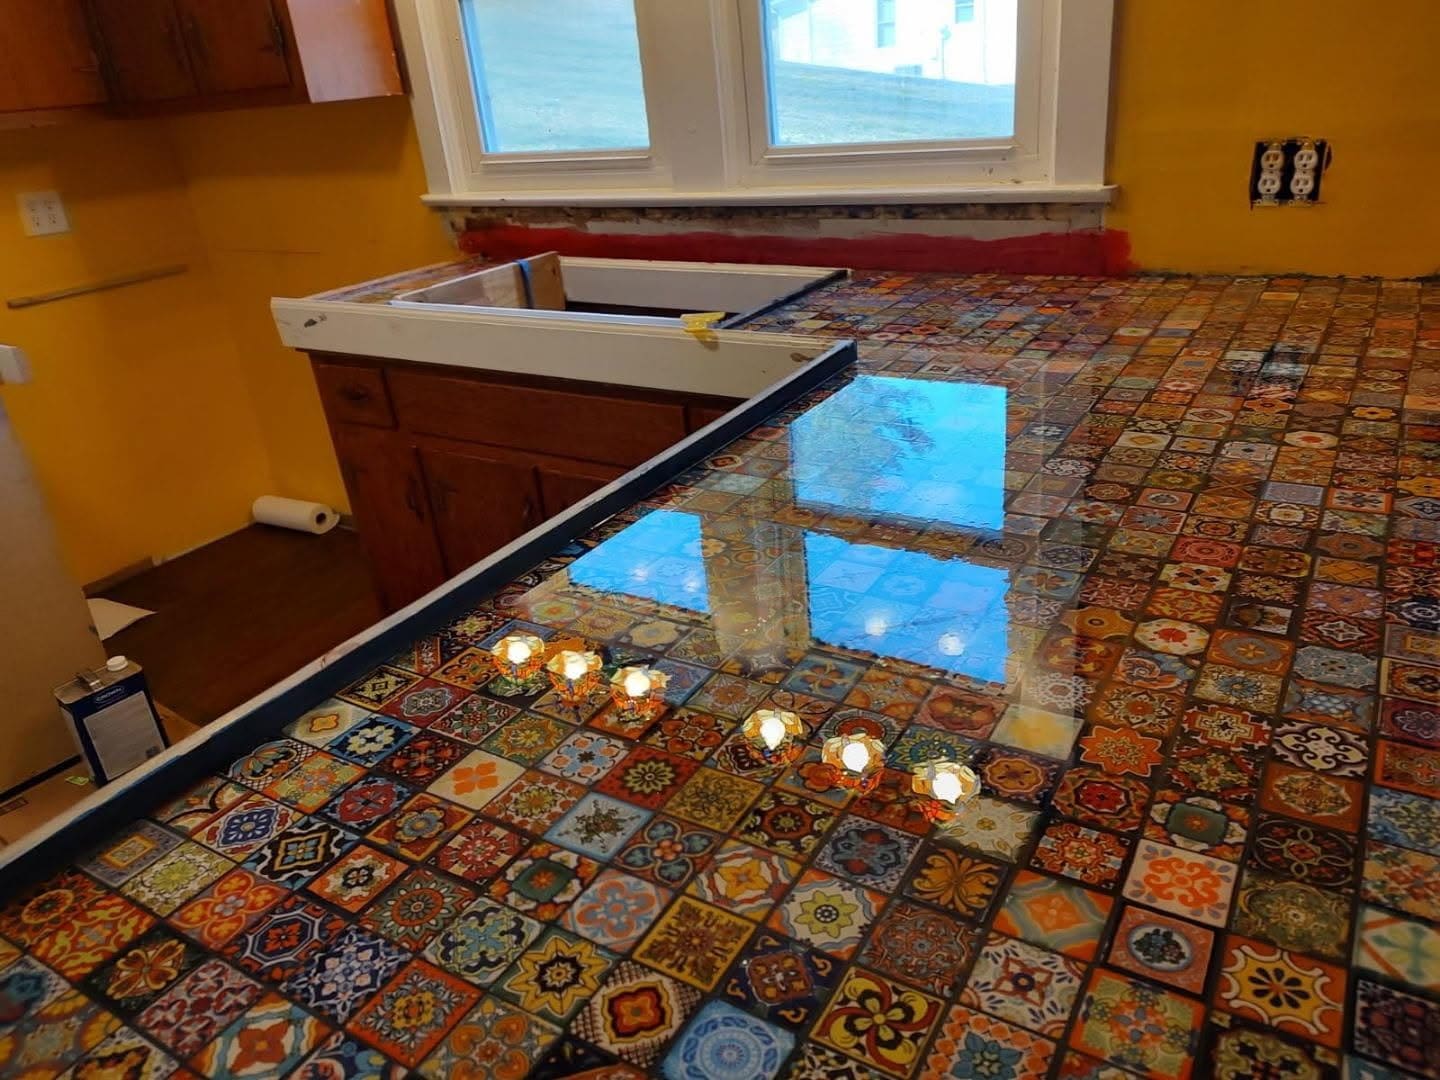
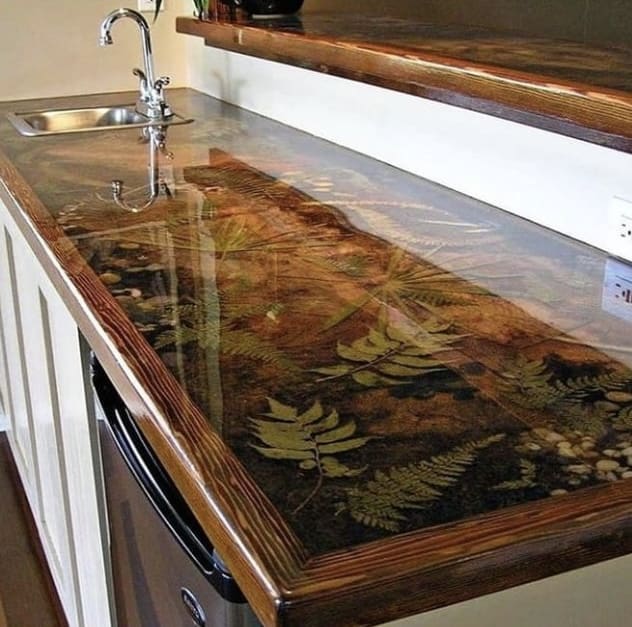
If you’re looking for something unusual, try layered pours with translucent layers. You can add dried leaves, small stones, metallic inserts, or pearlescent inks inside. The result is a “depth” effect — as if something is hidden within the surface.
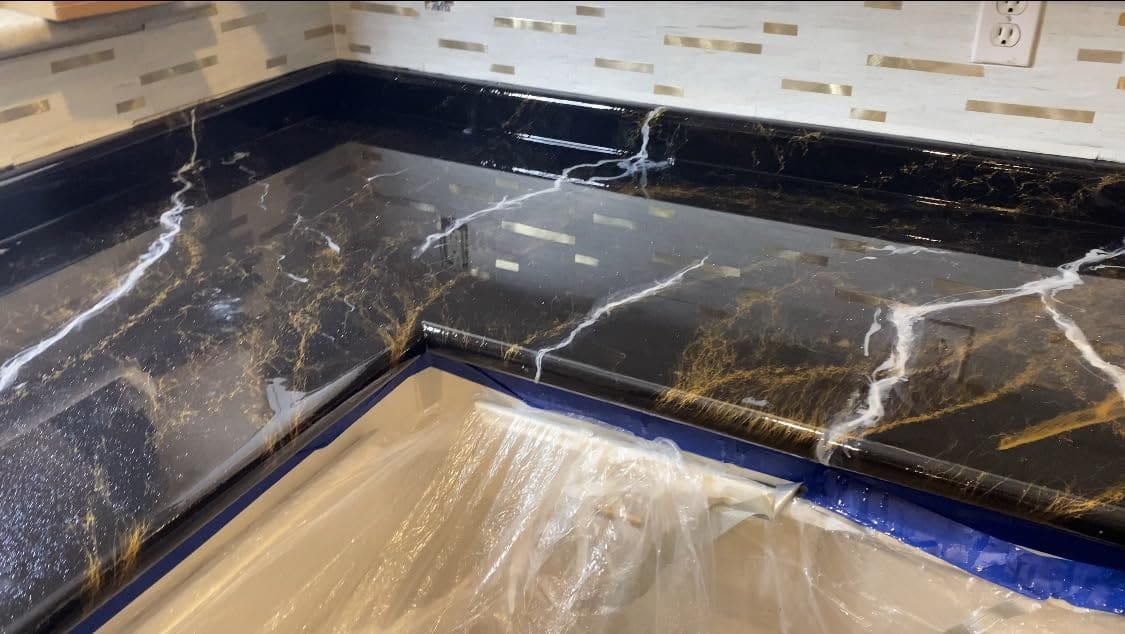
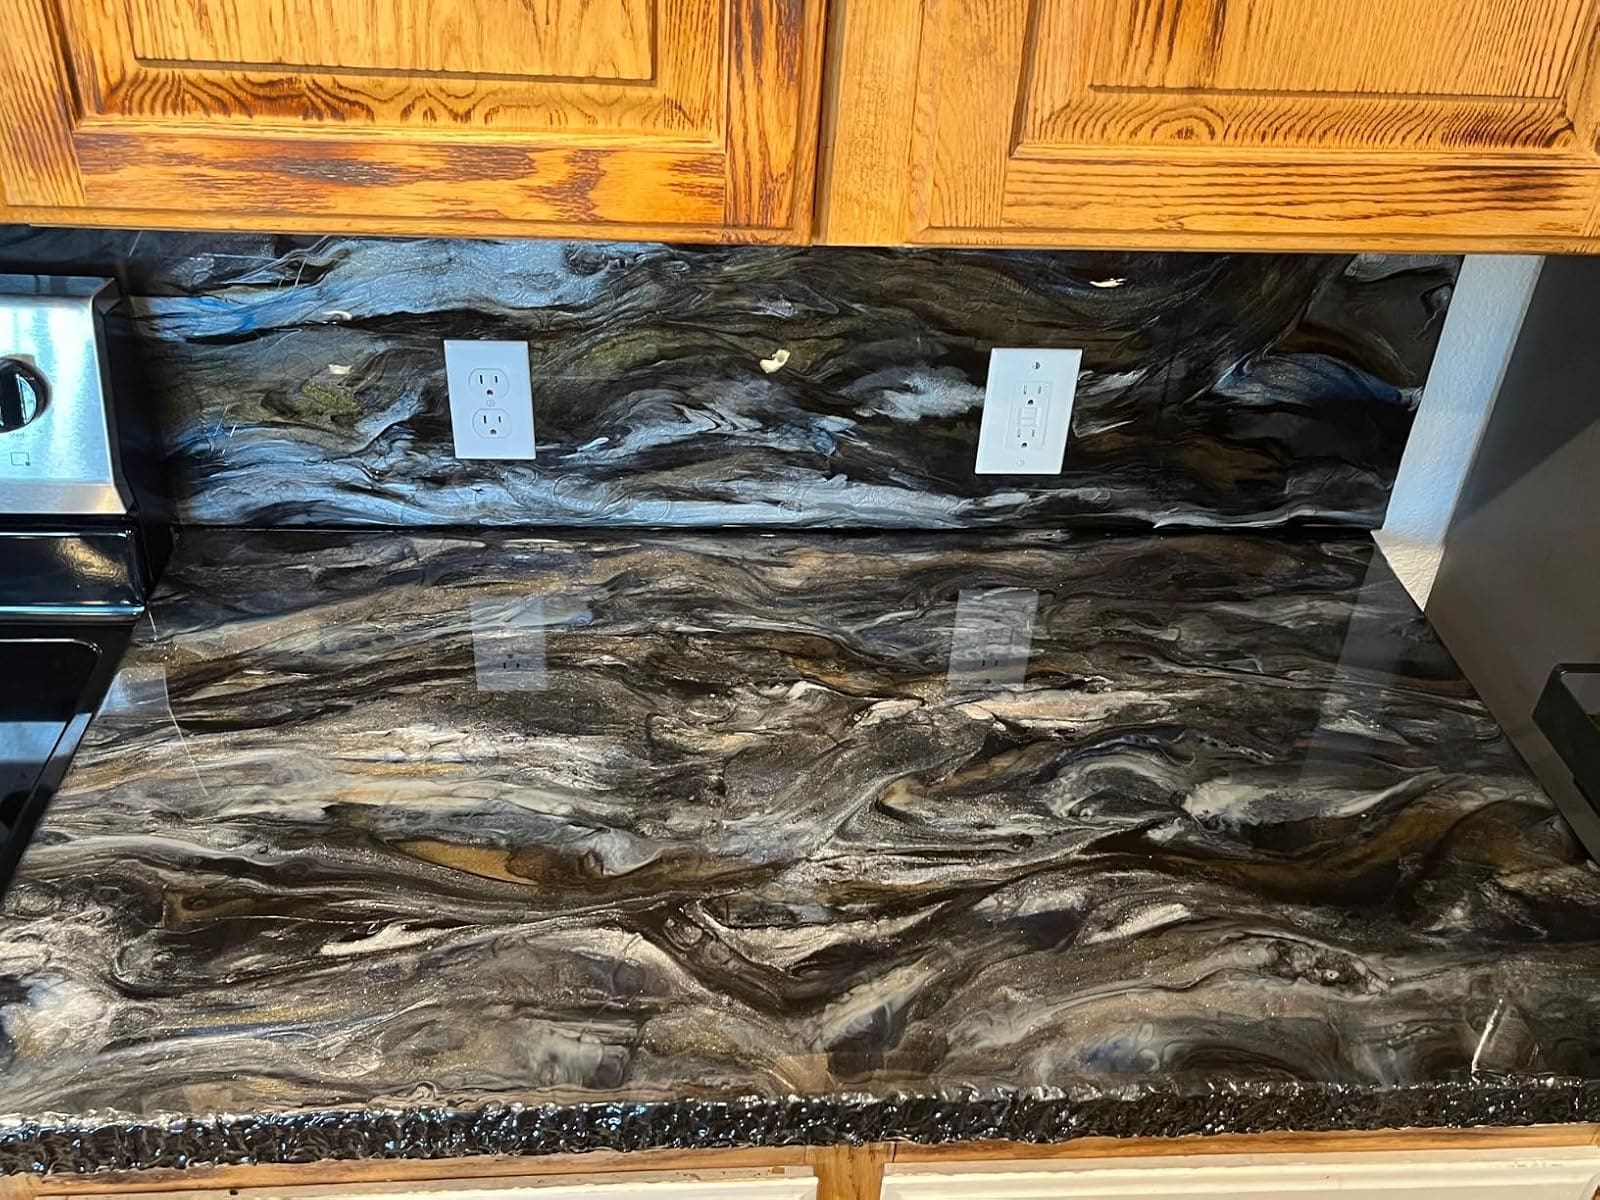
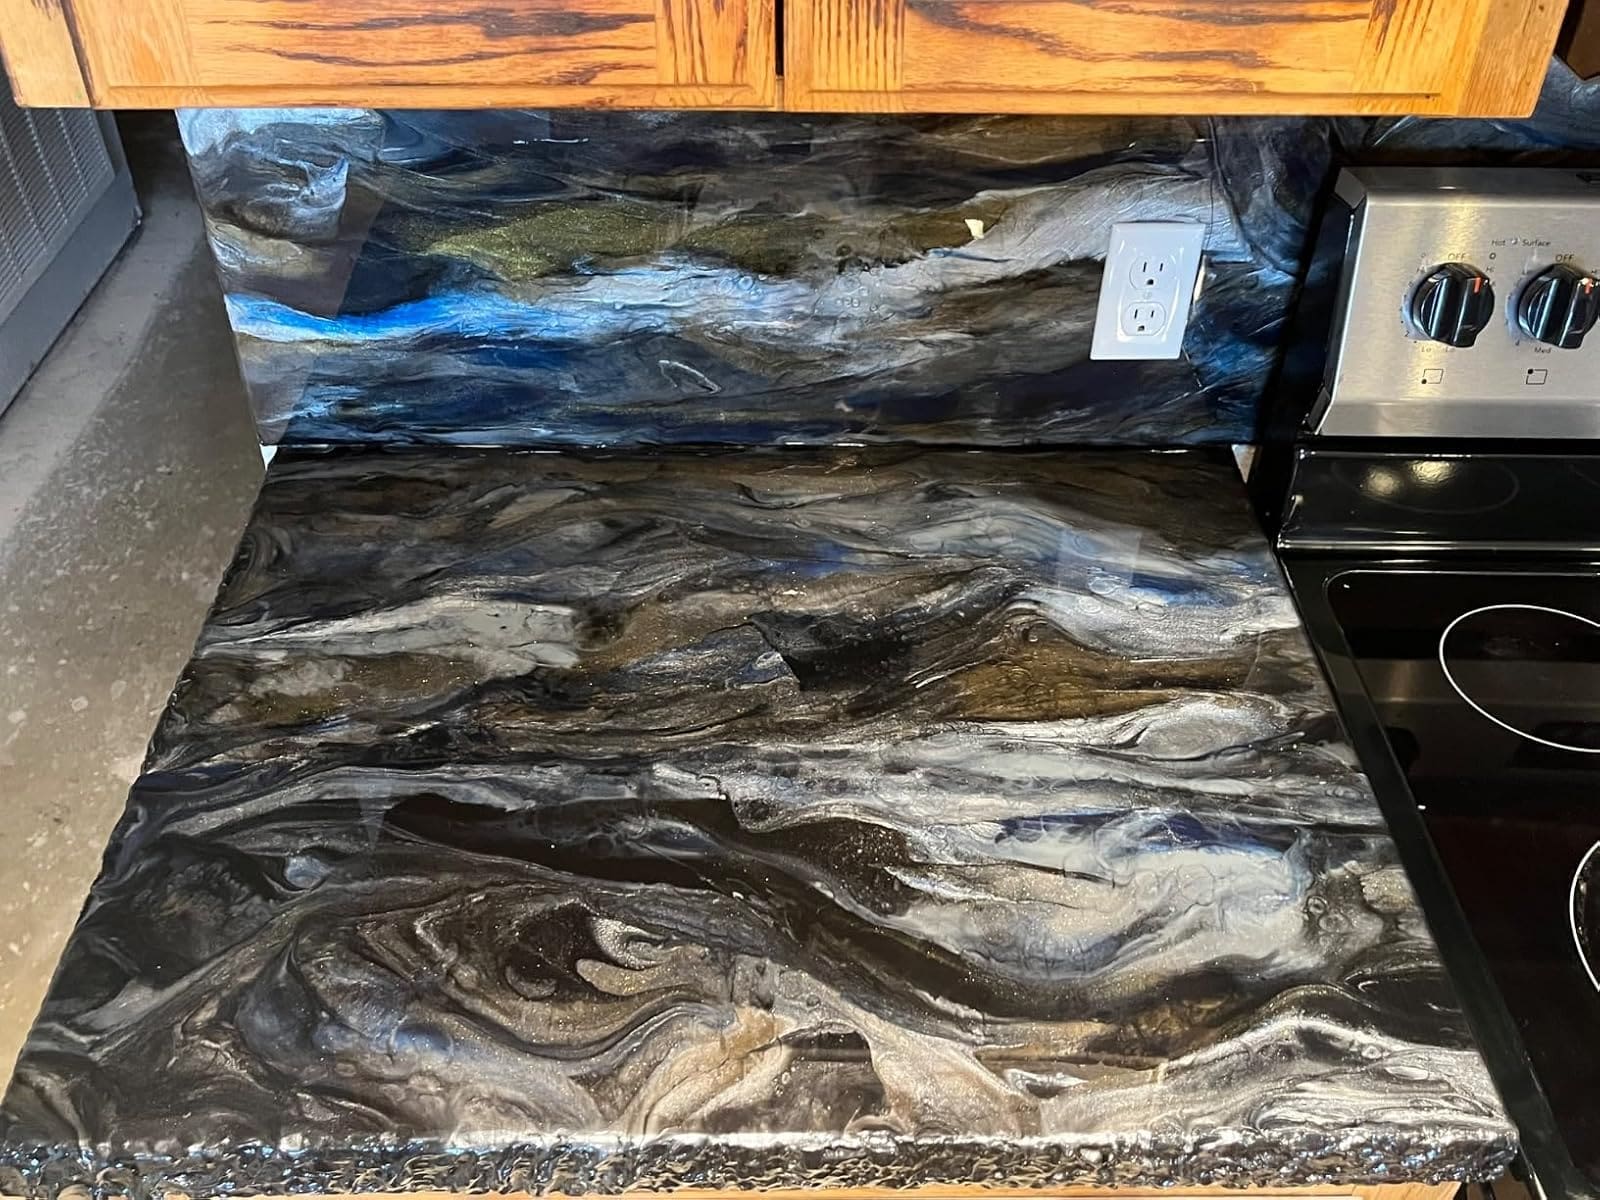
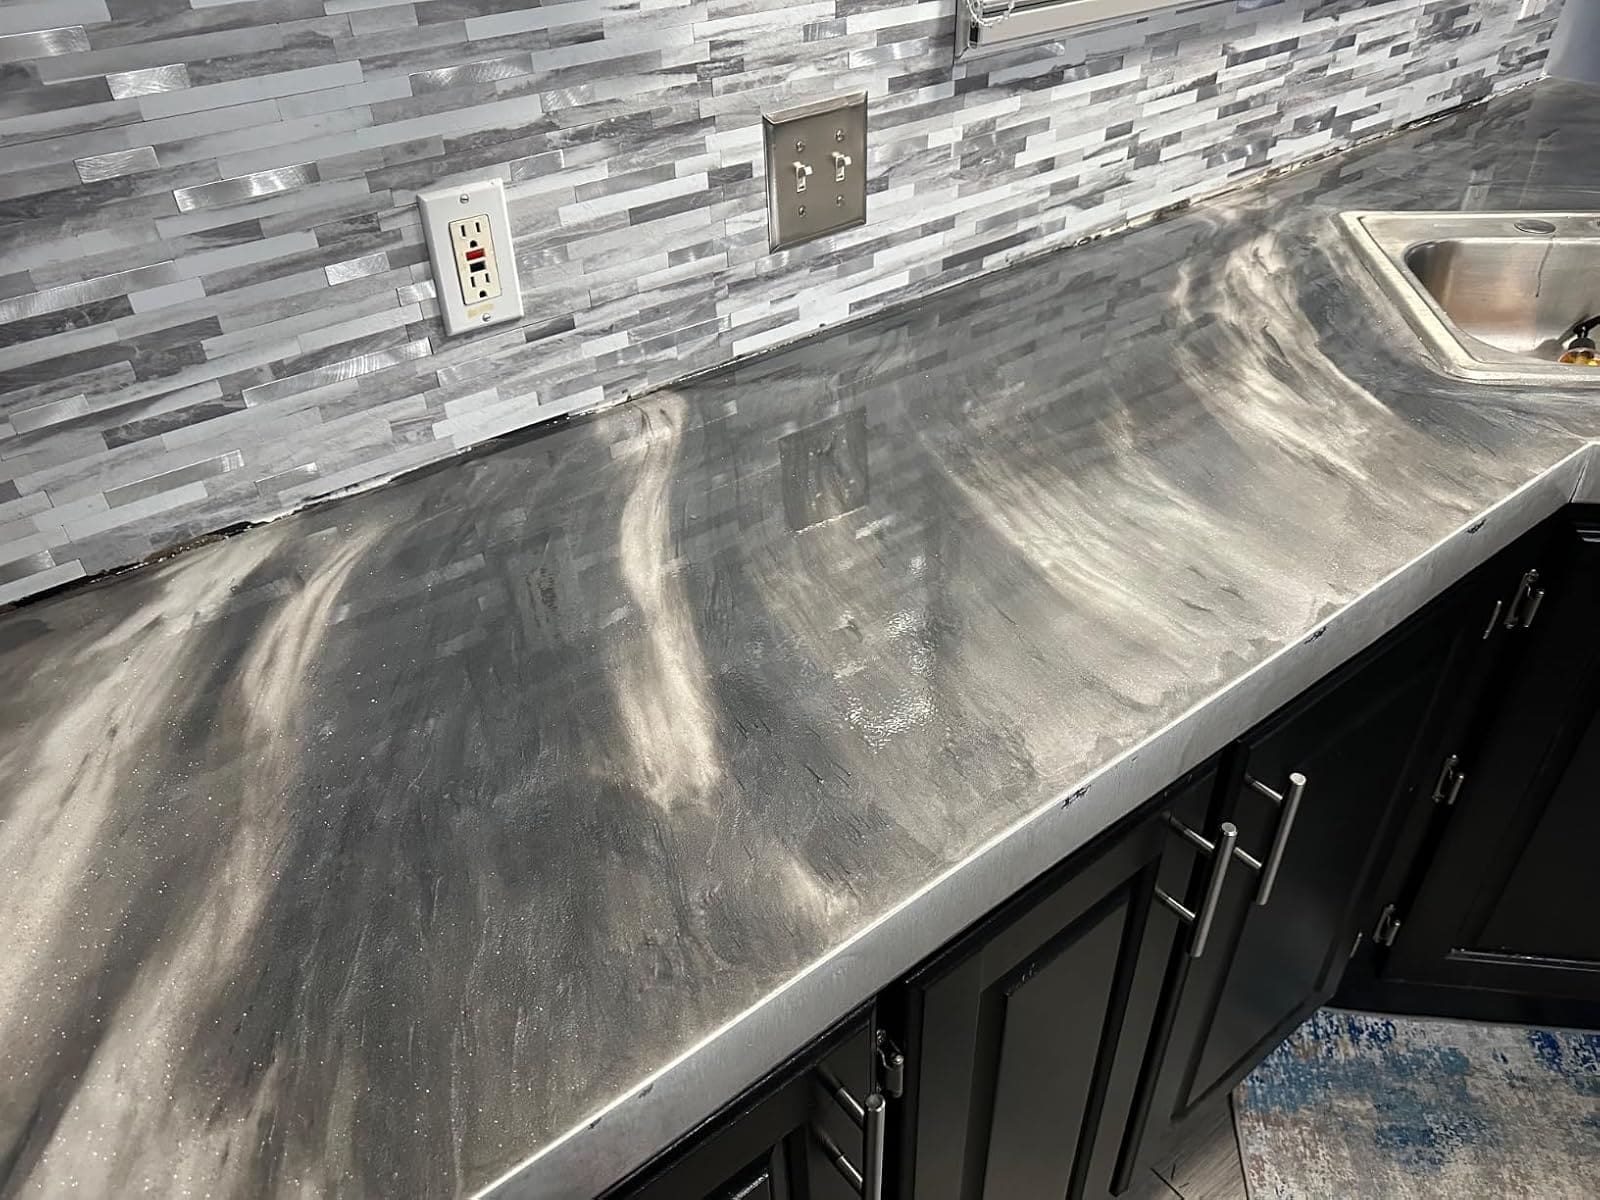
Dark Surfaces with Metallic Accents
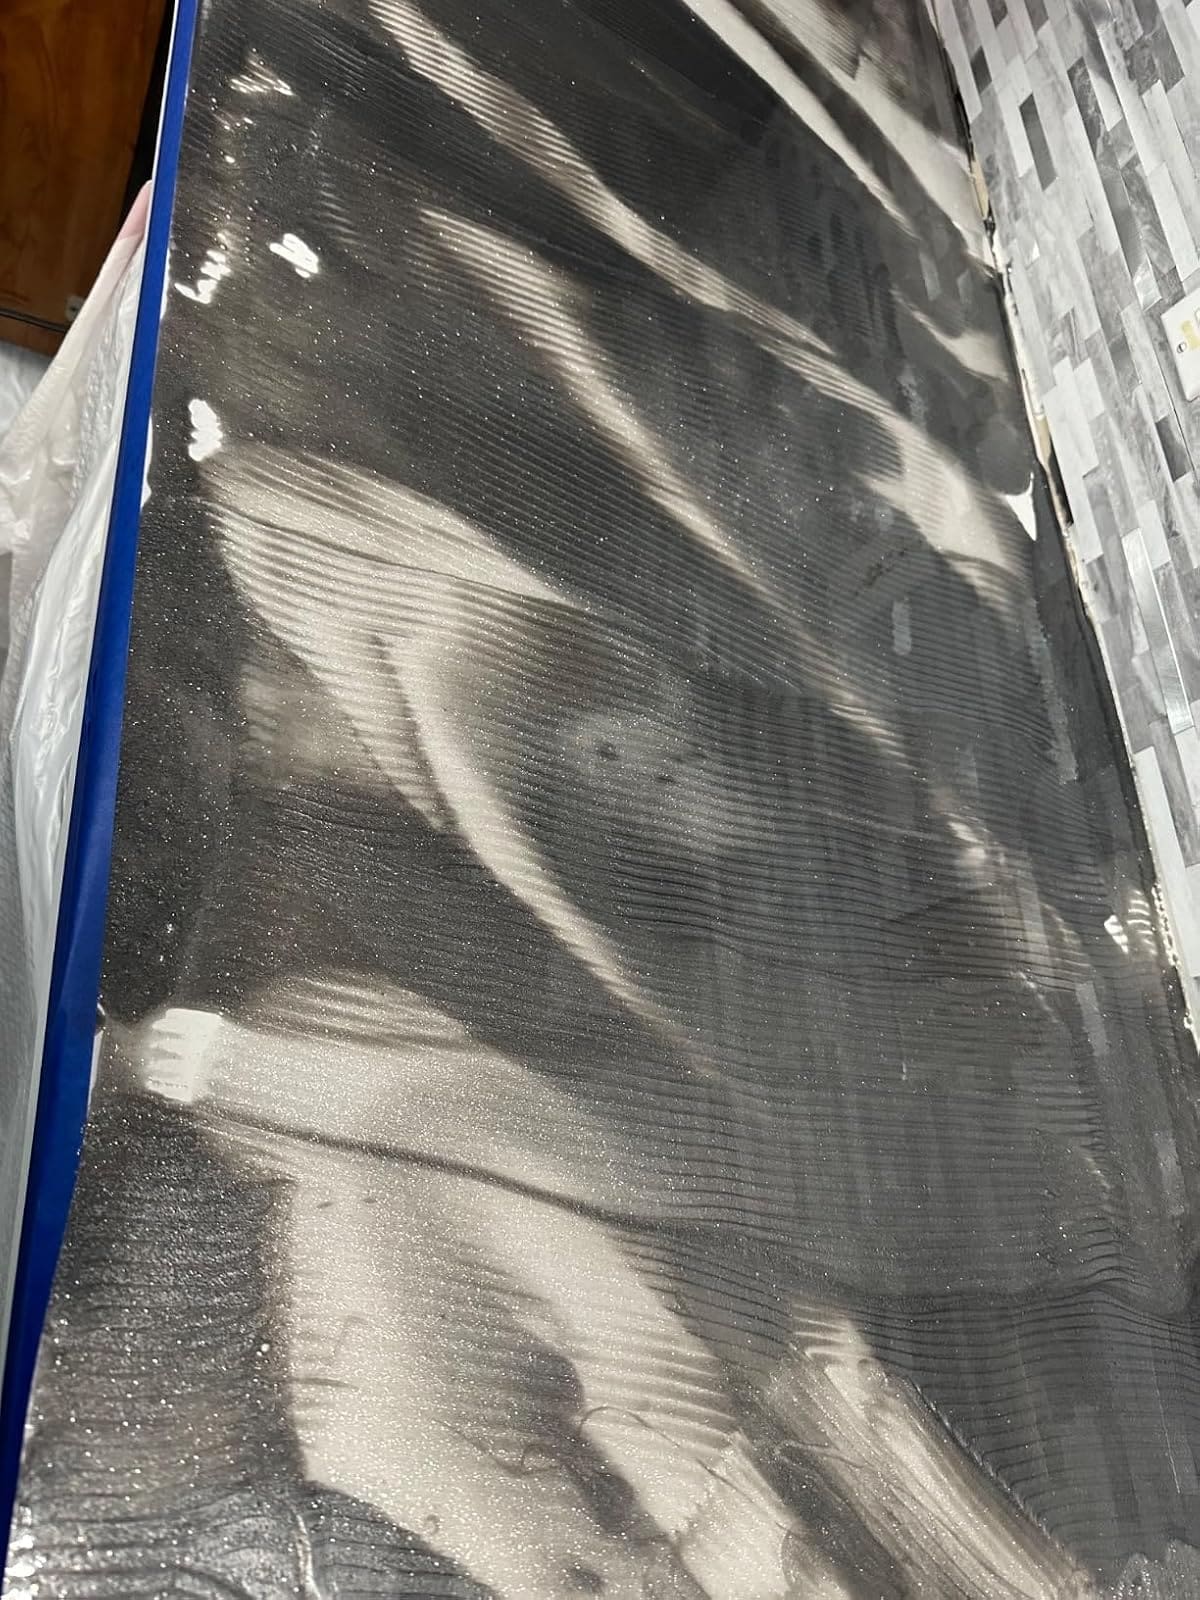
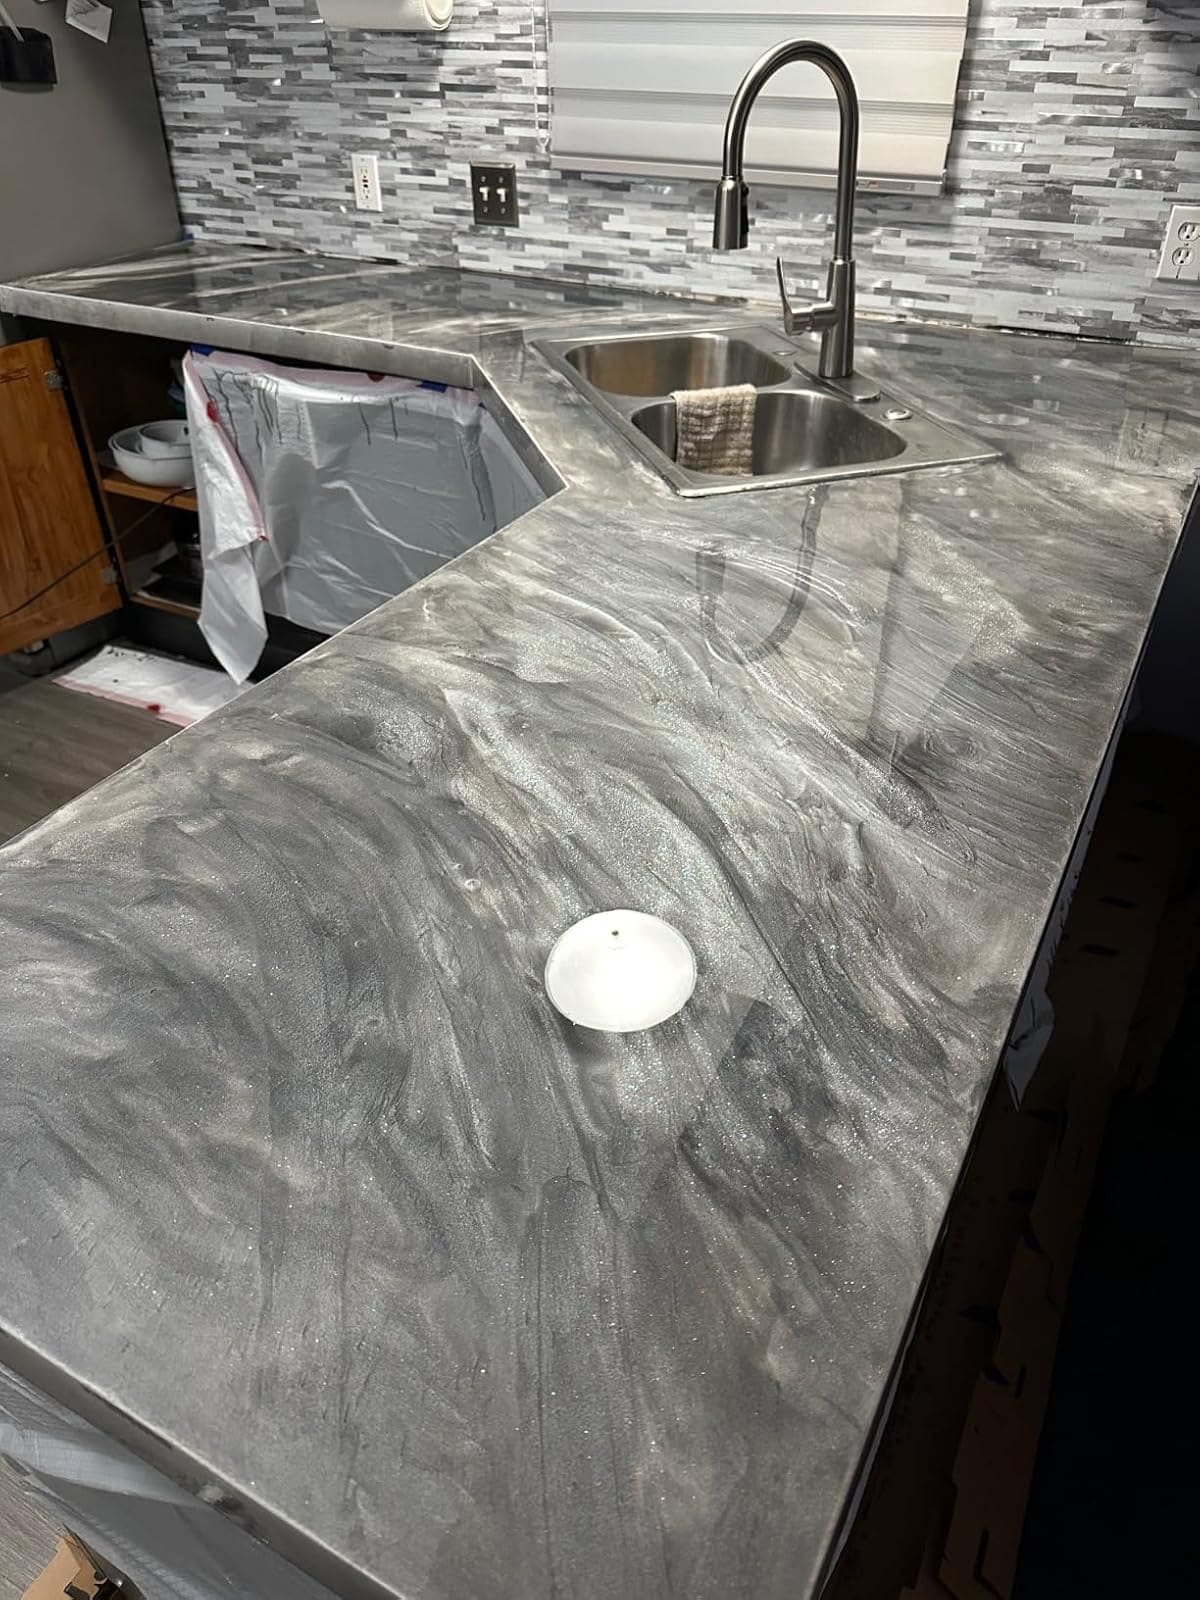
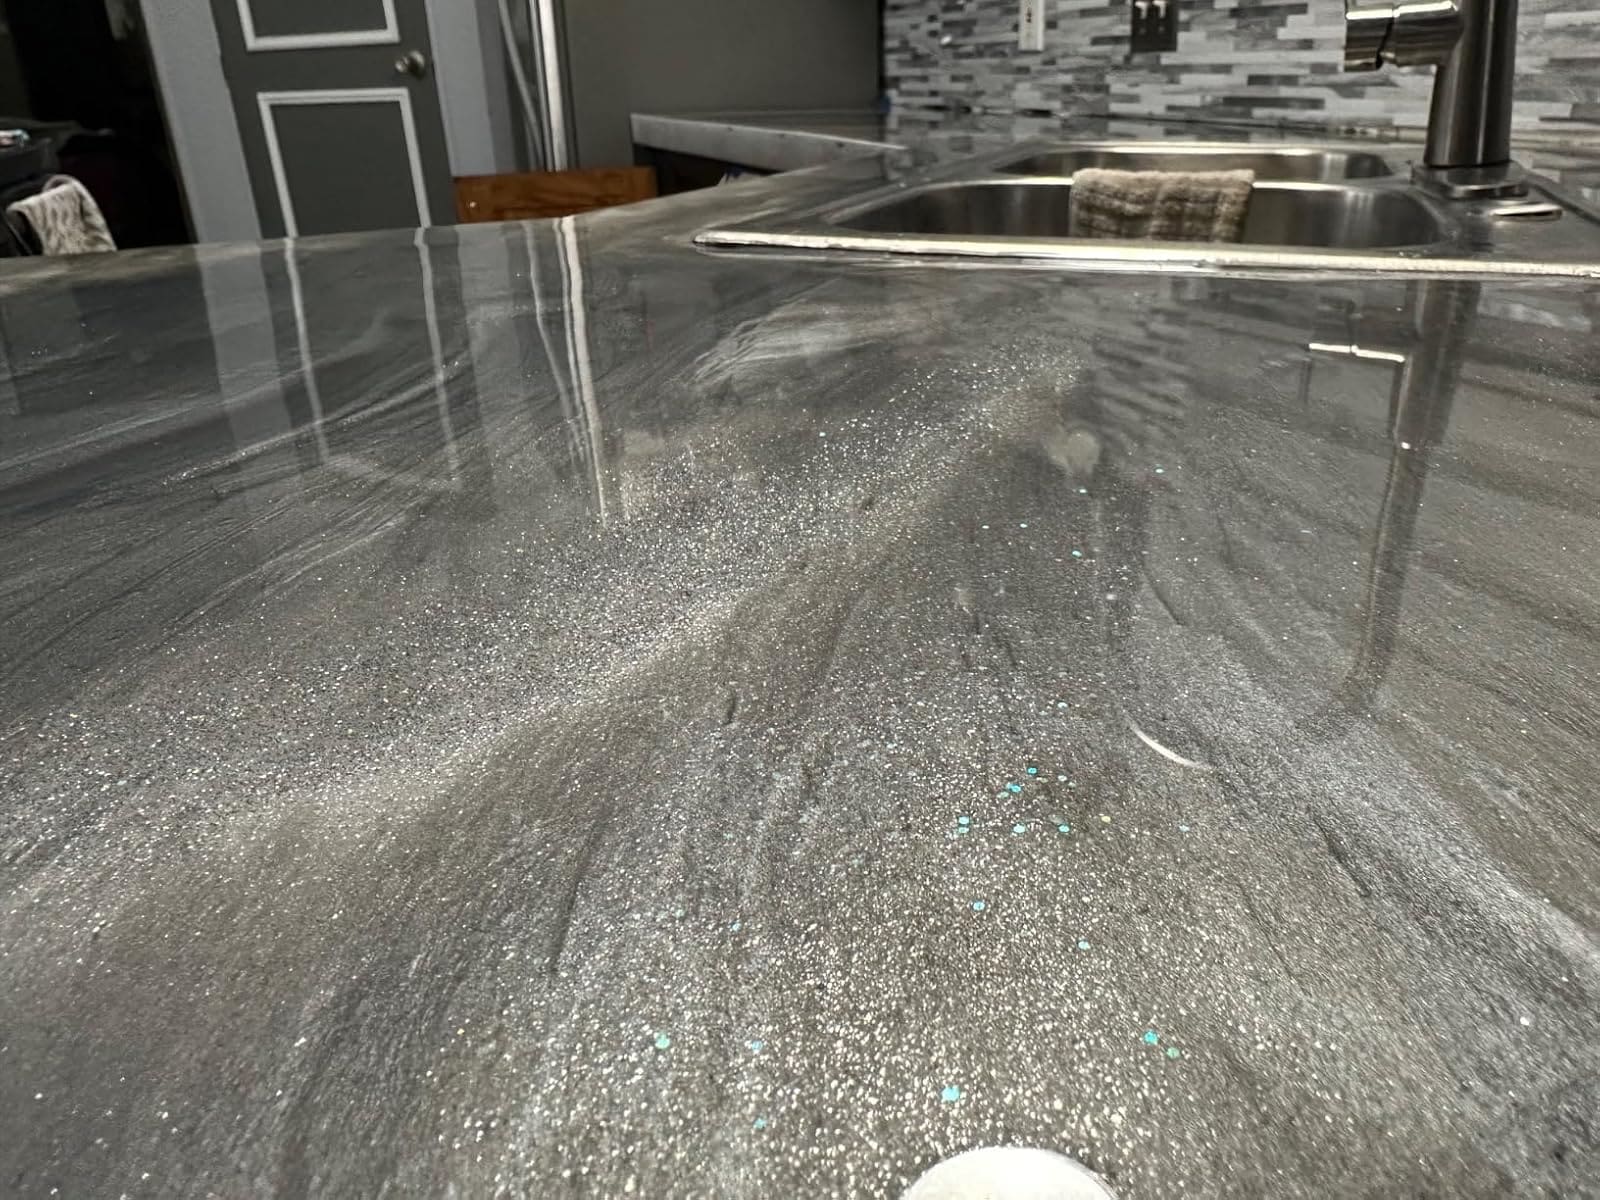
If you want your countertop to become the focal point of the kitchen — look into dark pours with metallic pigments. A black, graphite, or charcoal base can be accented with light veins to mimic smoke or metal. These countertops not only shimmer beautifully in daylight but also add visual depth to the whole interior.
Source: amazon.com
This option is great for modern interiors with personality: loft, industrial, graphic minimalism, or black-and-white kitchens.
Natural Textures and Themes
Source:@ebay (Pinterest)
Ocean waves, sandy gradients, forest greens — all of this can be recreated with inks and layered pours. This approach is often used in bathrooms, lounge areas, and country kitchens.
How to Choose the Right Style?
Ask yourself three questions:
What’s the style of your kitchen or bathroom? (Modern, Scandi, farmhouse, classic?)
Do you want the countertop to be the accent or the backdrop?
Is versatility or a “wow factor” more important to you?
These answers will help you choose the right palette and pour technique. The main thing — don’t be afraid to experiment. Even if it doesn’t turn out perfect the first time, the result will still be one of a kind. No one else will have a countertop exactly like yours.
How to Care for an Epoxy Resin Countertop: Simple and Hassle-Free
Epoxy resin is a fairly low-maintenance material — especially compared to natural marble or concrete. But if you want it to keep its shine, stay scratch-free, and not become cloudy over time, there are a few simple rules to follow. Nothing complicated — all based on real-world experience.
How to Clean It?
For everyday care, a regular soft cloth (microfiber is best) and warm water with a drop of dish soap will do the trick. The main thing is not to use harsh household cleaners with abrasives, bleach, or acids.
Can You Put Hot Items on It?
Epoxy doesn’t like sudden overheating. If you place a pan straight from the stove — it may leave a mark. Most manufacturers list heat resistance in the range of 120–150 °F. So it’s best to use trivets for hot pots, kettles, and baking dishes.
Can You Cut Directly on the Surface?
Technically, yes — but in practice, it’s better not to. Small scratches will accumulate over time, especially if you regularly use a knife without a cutting board. Epoxy resin is durable, but it doesn’t handle sharp objects well.
How to Restore the Shine?
If it’s been a few months or years and the surface has lost its gloss — that’s normal. Over time, it can develop tiny marks from dishes, sponges, and cleaning products.
You can bring back the shine by:
gentle sanding (abrasive sponge 1000+ or a buffing pad);
polish made for plastic or acrylic;
a thin layer of finish coat (if you’re already confident working with resin).
A Few Real-Life Tips:
Don’t scrub the surface with abrasive sponges (those stiff ones from the supermarket are a no-go).
Avoid letting wine, vinegar, or lemon juice sit on it for a long time — especially in one spot.
If a spill wasn’t cleaned right away — just rinse with warm water and dry thoroughly.
With the proper care, this kind of countertop can easily last 10 years or more — especially if you don’t treat it like a heavy-duty work surface.
Expert Conversation: The Stone Magazine — Dan Williams
The Stone Magazine (TSM): What’s the first thing people should know about epoxy resin countertops?
Dan Williams (DW): It’s a decorative and functional coating that can be applied over different substrates. The final result depends directly on surface preparation and the type of resin used.
TSM: How does epoxy resin differ from other countertop materials?
DW: Epoxy creates a seamless, moisture-resistant surface with a strong visual effect. It also allows you to refresh an old countertop without demolition.
TSM: Does this solution have limitations?
DW: Yes. Epoxy resin is sensitive to overheating and mechanical damage. It requires careful use and adherence to recommended conditions.
TSM: When does it make sense to consider alternatives?
DW: If maximum heat resistance and wear resistance are required without extra maintenance, quartz or natural stone are usually better options.
TSM: In what formats is epoxy resin most often used?
DW: Either as a pour-over on an existing countertop or as a fully cast surface made in a mold. Both formats are common in DIY projects.
Frequently Asked Questions (FAQ)
What is the best epoxy resin for a countertop?
Look for products specifically designed for countertops — labeled as food-safe and heat-resistant. Brands like Stone Coat, Pro Marine, or TotalBoat are good choices.
Can I make an epoxy resin countertop myself?
Yes, and many people do. The key is to follow the step-by-step instructions and not rush. For your first project, choose a simple shape and a classic design without complicated effects.
How much does it cost to make an epoxy resin countertop yourself?
On average — between $300 and $900* for the entire surface (depending on size, resin type, and tools). That’s at least half the price of quartz, granite, or marble.
How long does the whole process take?
Preparation and pouring take about 1–2 days. After that, the resin needs 24–72 hours to fully cure. Ideally — one week from start to finish.
What if I already have a quartz or granite countertop — can I pour resin over it?
You can, but only if the surface is properly prepped: sanded, degreased, and coated with a base layer. It’s more of a decorative technique than a necessity — but visually, it works.
The Stone Magazine Editorial Tip
Most problems with epoxy countertops come from expectations rather than the material itself. Visually, these surfaces can resemble stone or high-end designer pieces, but in feel and performance, they are a different category of countertop.
It’s also important to consider professional help if a project goes beyond a DIY scope. Warranties and real customer reviews remain key reference points when choosing a contractor for epoxy countertop projects. They help show how a company performs in real-world conditions and how consistently it delivers results.
One useful reference is the CountertopsContractors ranking — an independent list of contractors across the U.S., based on installation quality, experience, and market reputation. This makes it easier to compare specialists and choose the right professional for your project.
Conclusion
Sometimes, what seems complicated at first turns out to be completely doable — once you break it down step by step and understand where to begin. That’s exactly the path we’ve taken in this article.
You’ve learned what types of resin exist and how to choose one that’s safe for kitchen use. You’ve figured out how to properly prep the surface, how to pour, create a design, avoid mistakes, and care for the finished countertop. We compared epoxy resin with other materials, found inspiration, and explored which styles really work in real kitchens and bathrooms.
In the end — you’re left with more than just theoretical knowledge. You now have a complete, honest, step-by-step guide that’s been tested in practice. And all that’s left is to apply it — at your own pace, in the way that’s right for you.
Wishing you confidence, inspiration, and satisfaction with the result. You’ve absolutely got this — because now you truly know how it’s done.
* The price is valid as of May, 2025, published for informational purposes and may differ on the day the article is read. Prices are based on average data from Home Depot, Houzz, HomeAdvisor, and other relevant sources in the U.S.
All images are sourced from Unsplash photo stock or publicly available contractor portfolios. If you believe any image is privately owned and used without proper credit, please contact us at contact@countertopcontractors.com.
Some authors may write under a pseudonym and choose not to disclose their identities for personal reasons. We respect their privacy and simply provide a platform for professional, educational use. We are not responsible for name coincidences with real individuals. All contributors are vetted for expertise, but we advocate for freedom of expression.
Disclaimer: This article is for informational purposes only and is not a substitute for professional consultation. While we’ve made every effort to provide accurate and detailed guidance, every project is different. Any work you choose to perform based on this guide is done at your own risk. Neither the author nor the editorial team accepts any responsibility for damage or injury resulting from the installation process.
If you are unsure at any point, it is strongly recommended that you consult a licensed professional.